Welcome back! In Part 2, we’ll explore adding Quixel Materials to your designs in Fusion 360 and setting up a rendering scene. If you haven’t already, review Part 1 and install Quixel Mixer. You’ll want to create and export a mix for use in Fusion 360 prior to the steps in this tutorial, or download an example material set here.
First, let’s create a new project in Fusion 360:
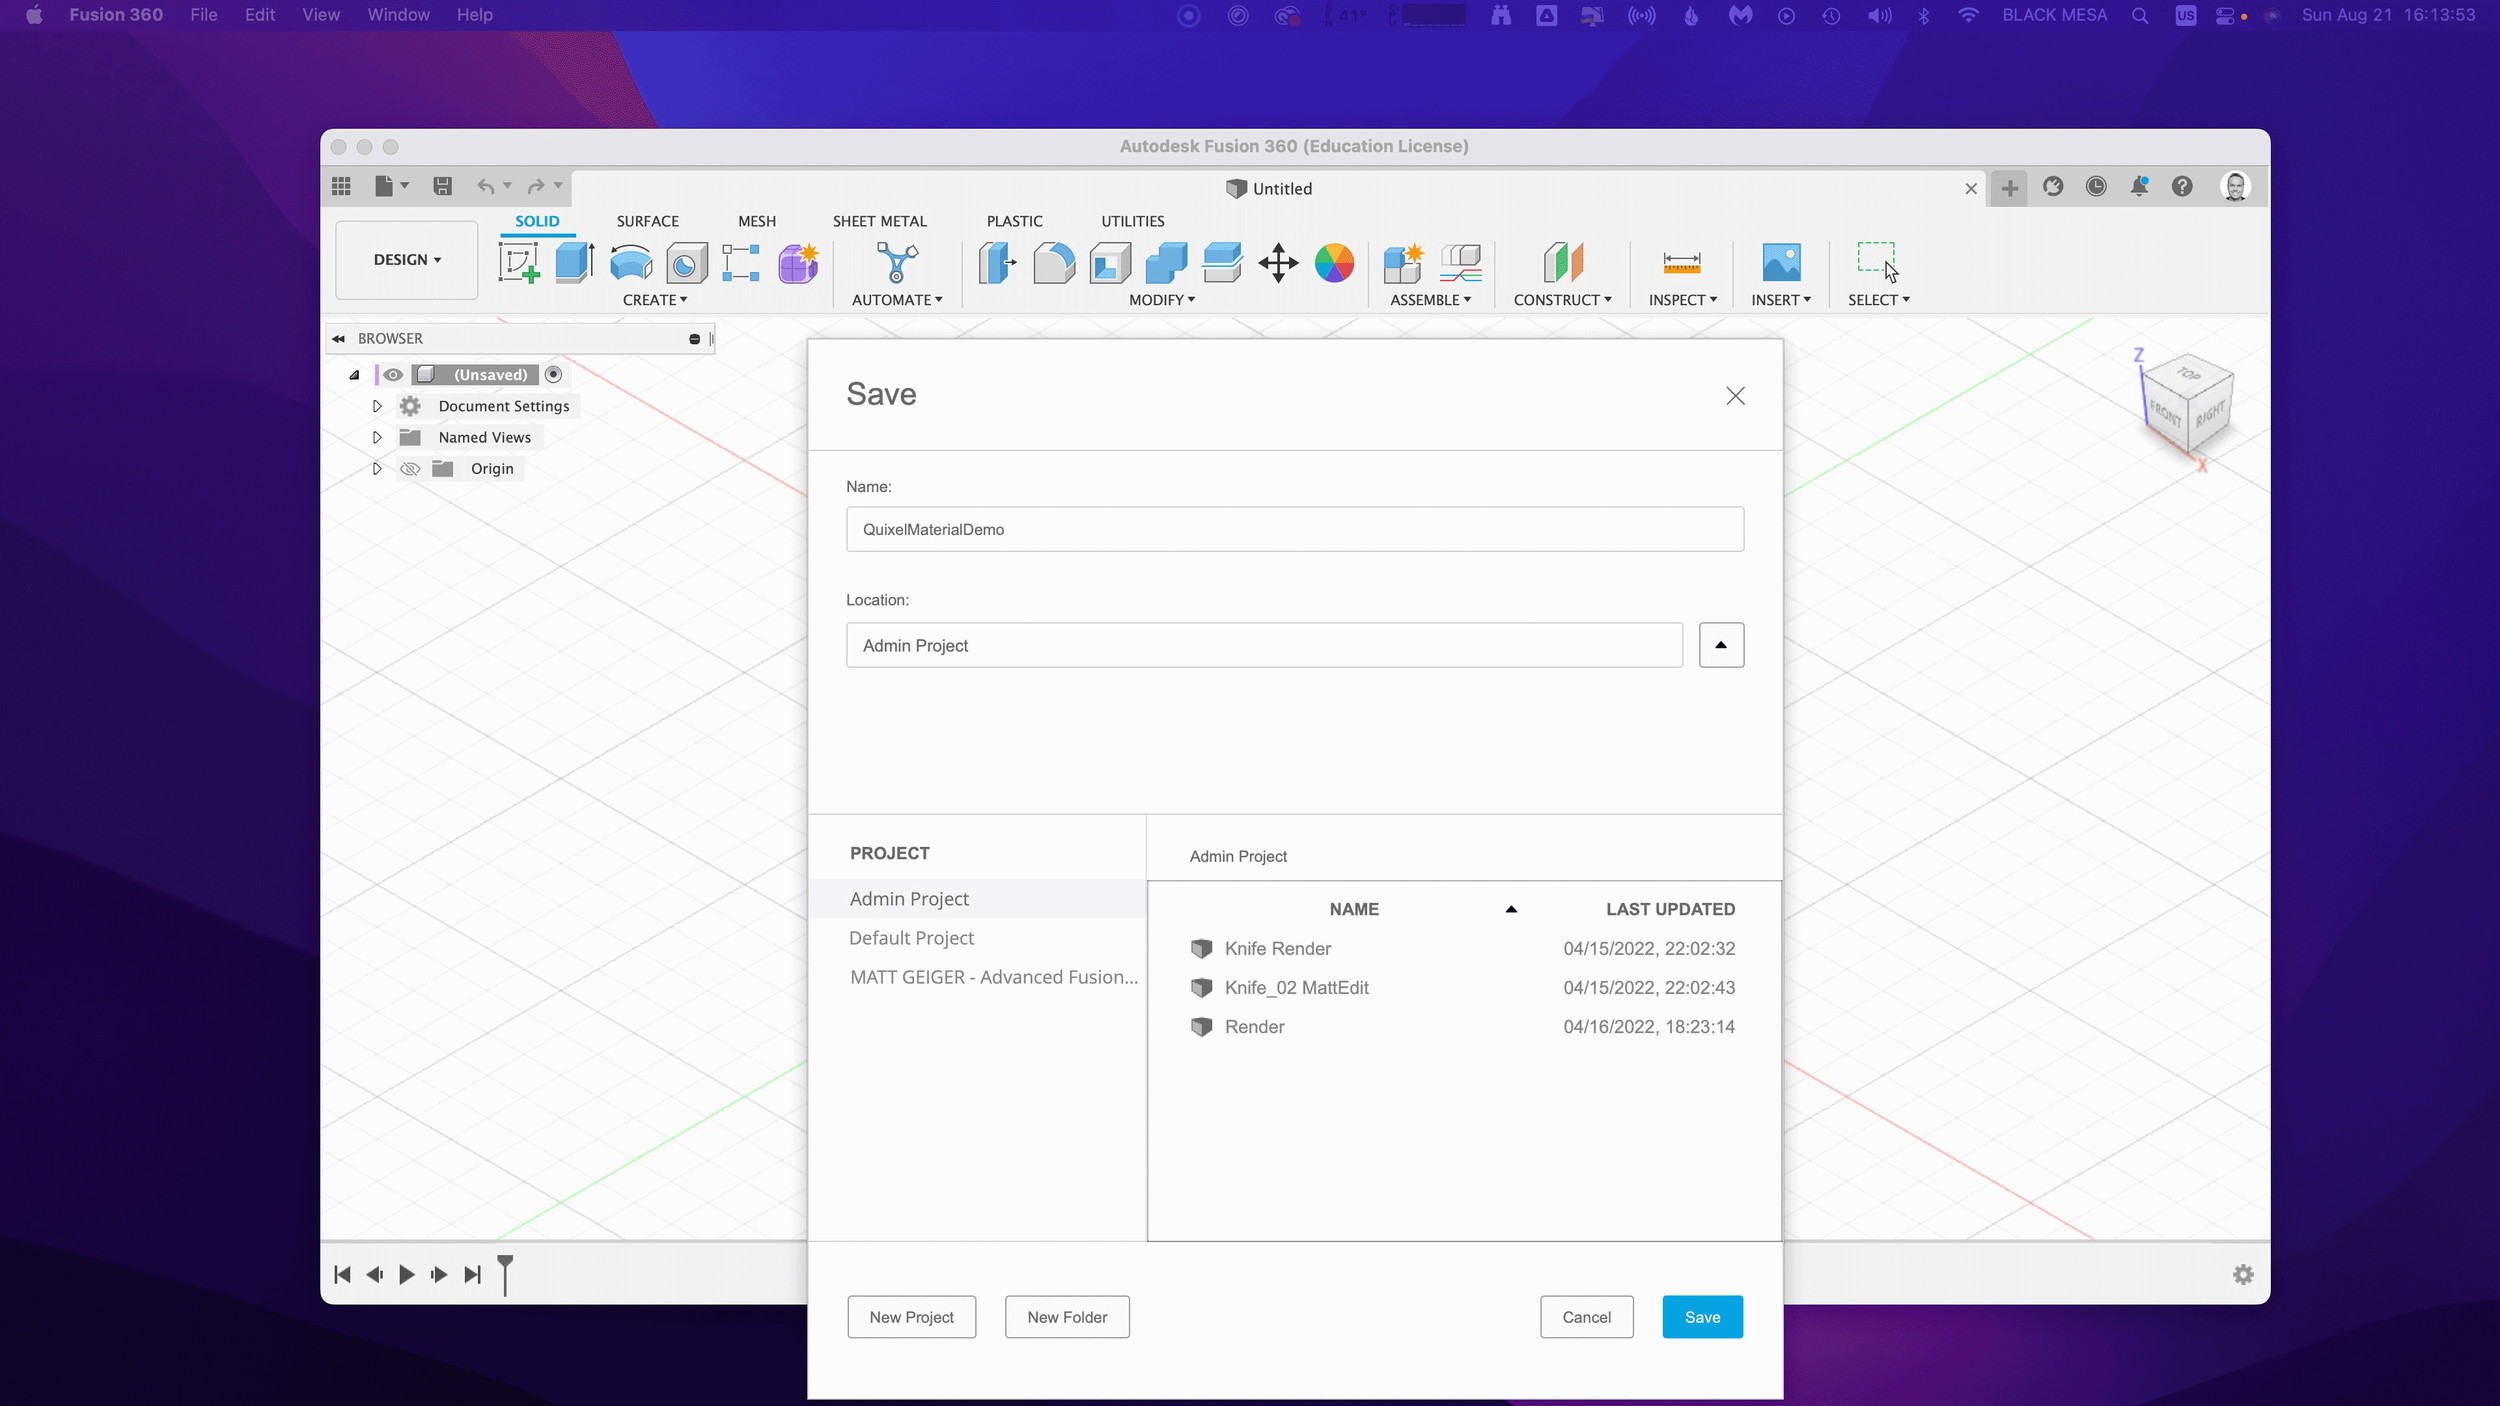
Creating a new Fusion 360 Project

After you open Fusion 360, Click “Save” and give your project a name. In this example I used “QuixelMaterialDemo.”
After you save your project, we’ll want to create a new component and make it active.
2. Create a new Component
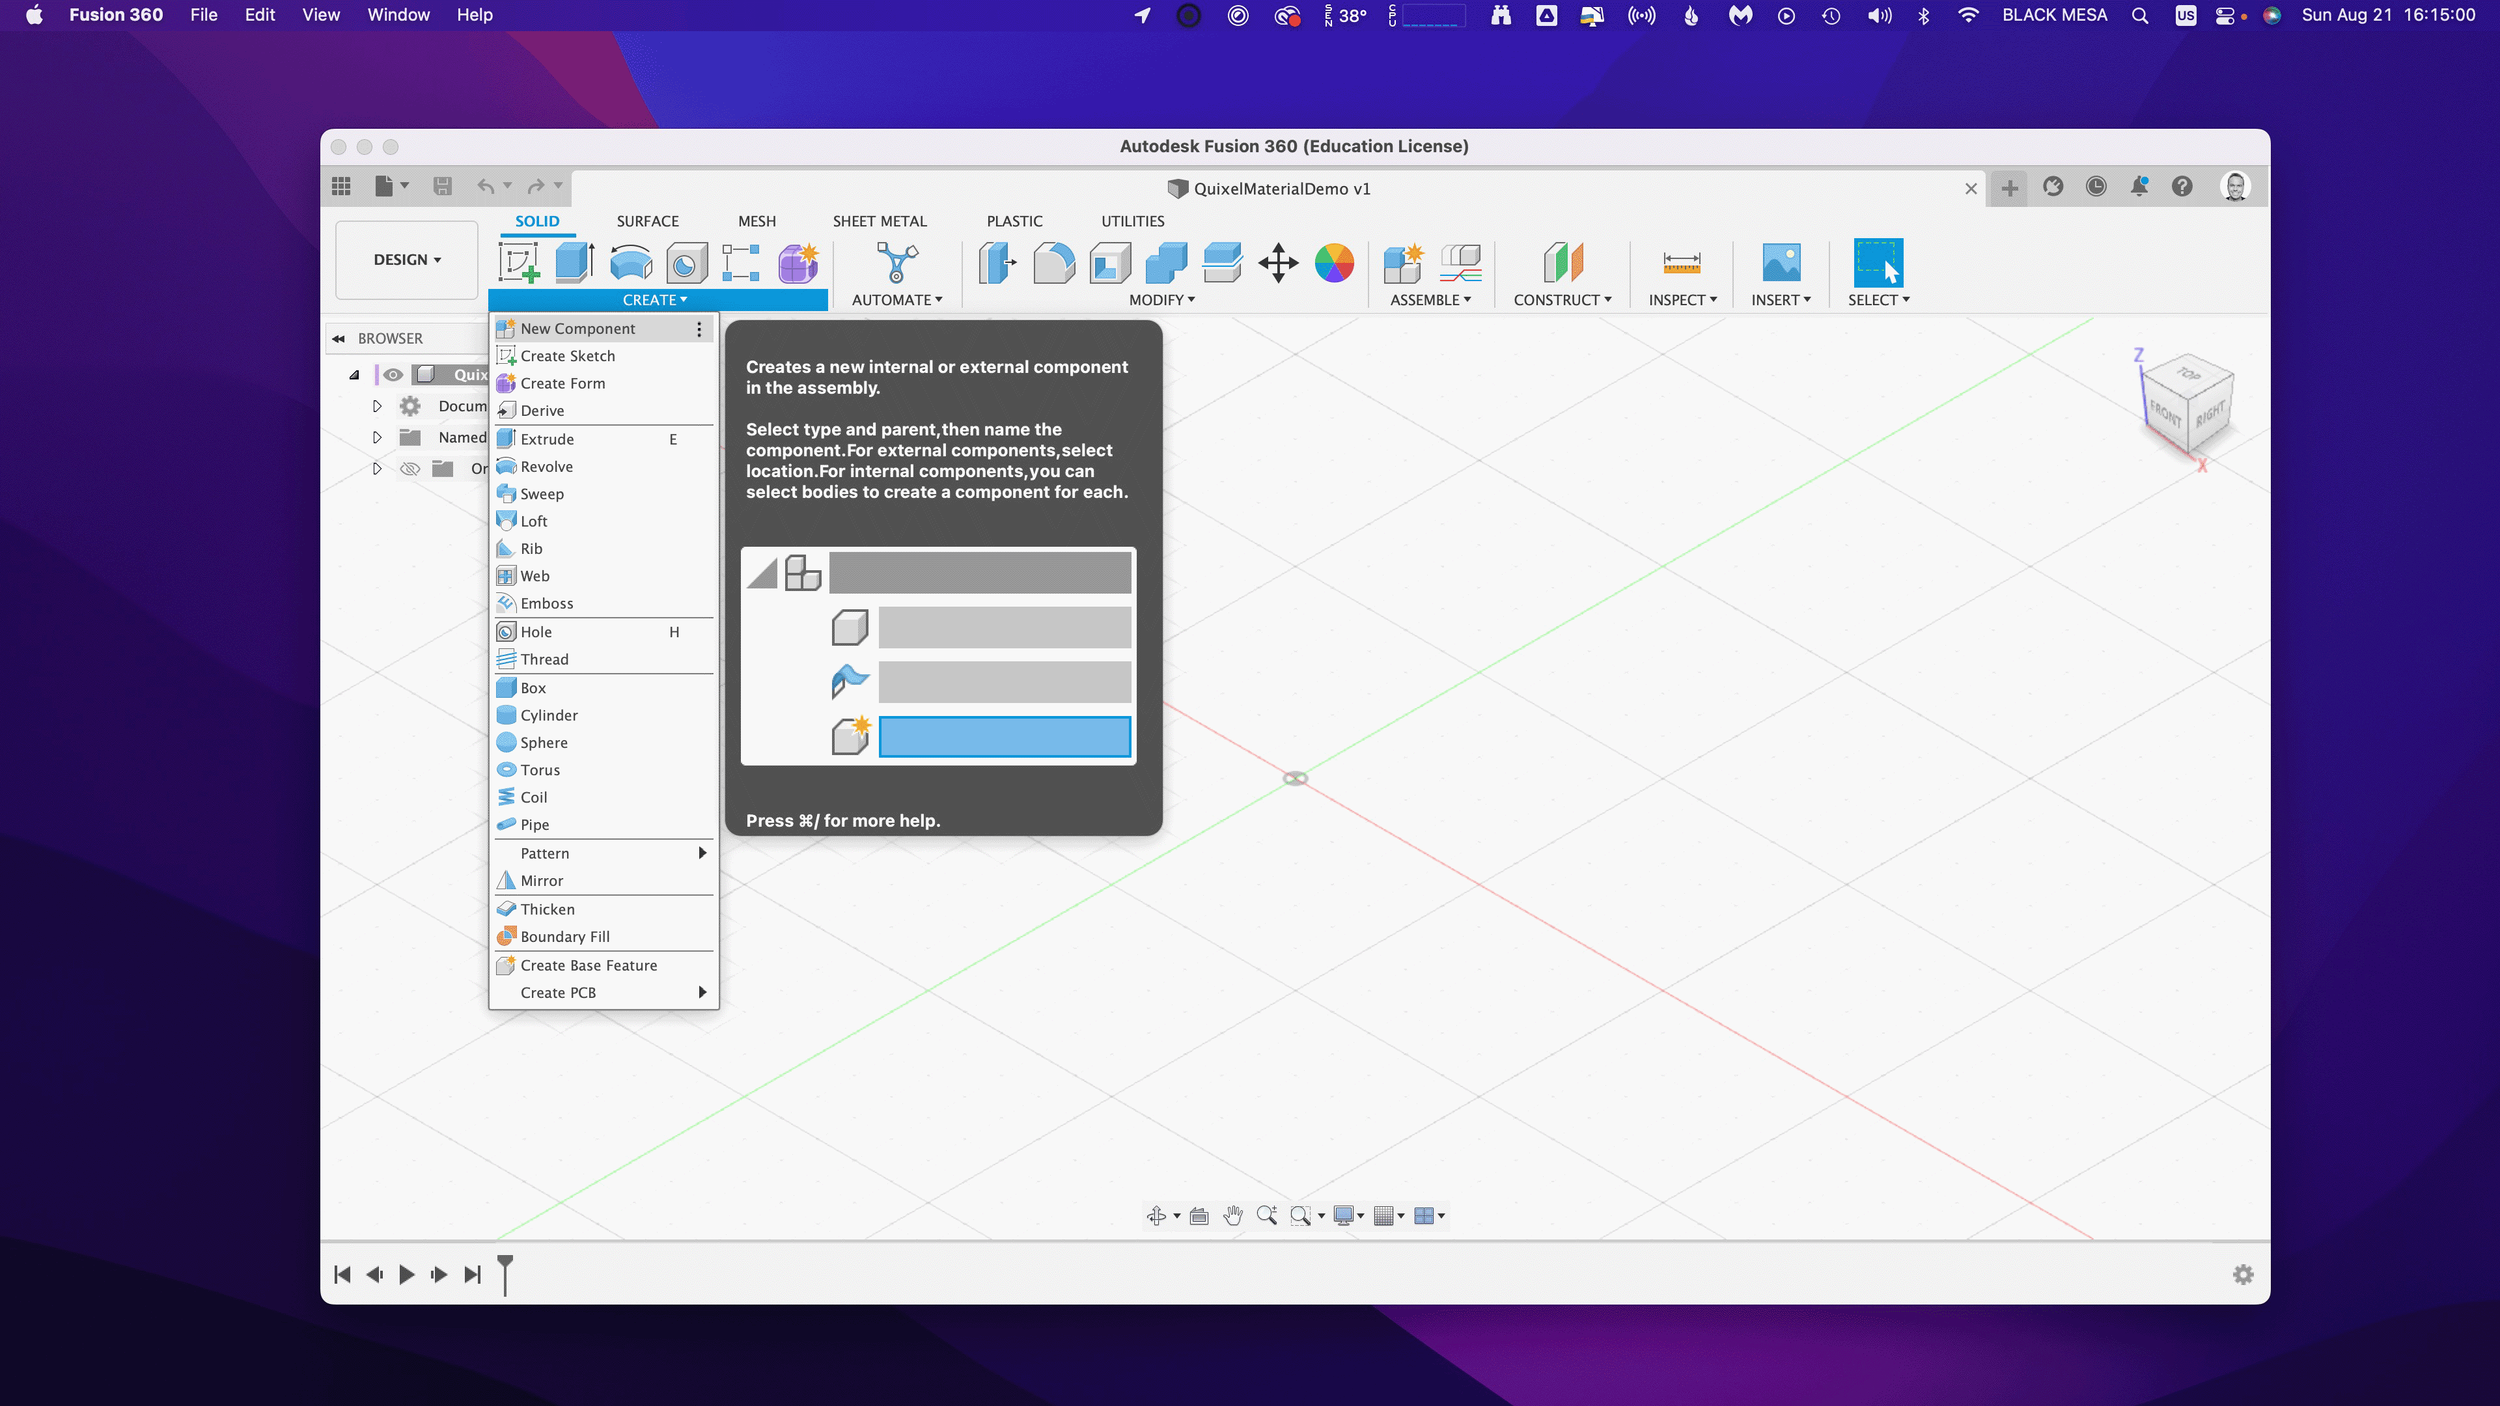
This is generally a good practice with Fusion 360, because we can more easily manage changes made to the design when the timeline is broken up by individual component histories. Name your component “Floor” and then make sure “Activate” is selected (should be by default), click “OK” to continue.

Next, we’ll want to create a sketch to define the floor’s dimensions. Click “Create” and make a Center Rectangle on the bottom plane.
3. Create a Floor

Make your sketch 3 meters x 3 meters in size, with the Origin at the center. Click “Finish Sketch” to continue. If you’ve done everything right, then you should have a sketch that is fully constrained (i.e., you’ll see black lines instead of blue lines for the outer dimensions of your sketch).

Next, we’ll extrude the sketch below the plain. This will create a new body, based on our sketch dimensions.

Click Create and then Extrude. Then, extrude the sketch -1mm below the plane and click “OK.”

Next, Save the design. You’ve created your first body and now would be a good time to save your progress.

Note the reason for your save and Click “OK.”

Next, we’ll want to change the Appearance of our floor. Click Modify Appearance to bring up the Appearance Window.
4. Add material

Here we can see the default material for the Floor body. We’ll want to replace that material with our Quixel Mix. To do that, let’s start by downloading a similar material.
Note: in general, you’ll find it is easier to add Quixel Mixer materials when you adapt an existing material in Fusion 360 with similar attributes. In this case, we can use the existing Asphalt Material.

After the download finishes, click and drag the Asphalt material into your design.
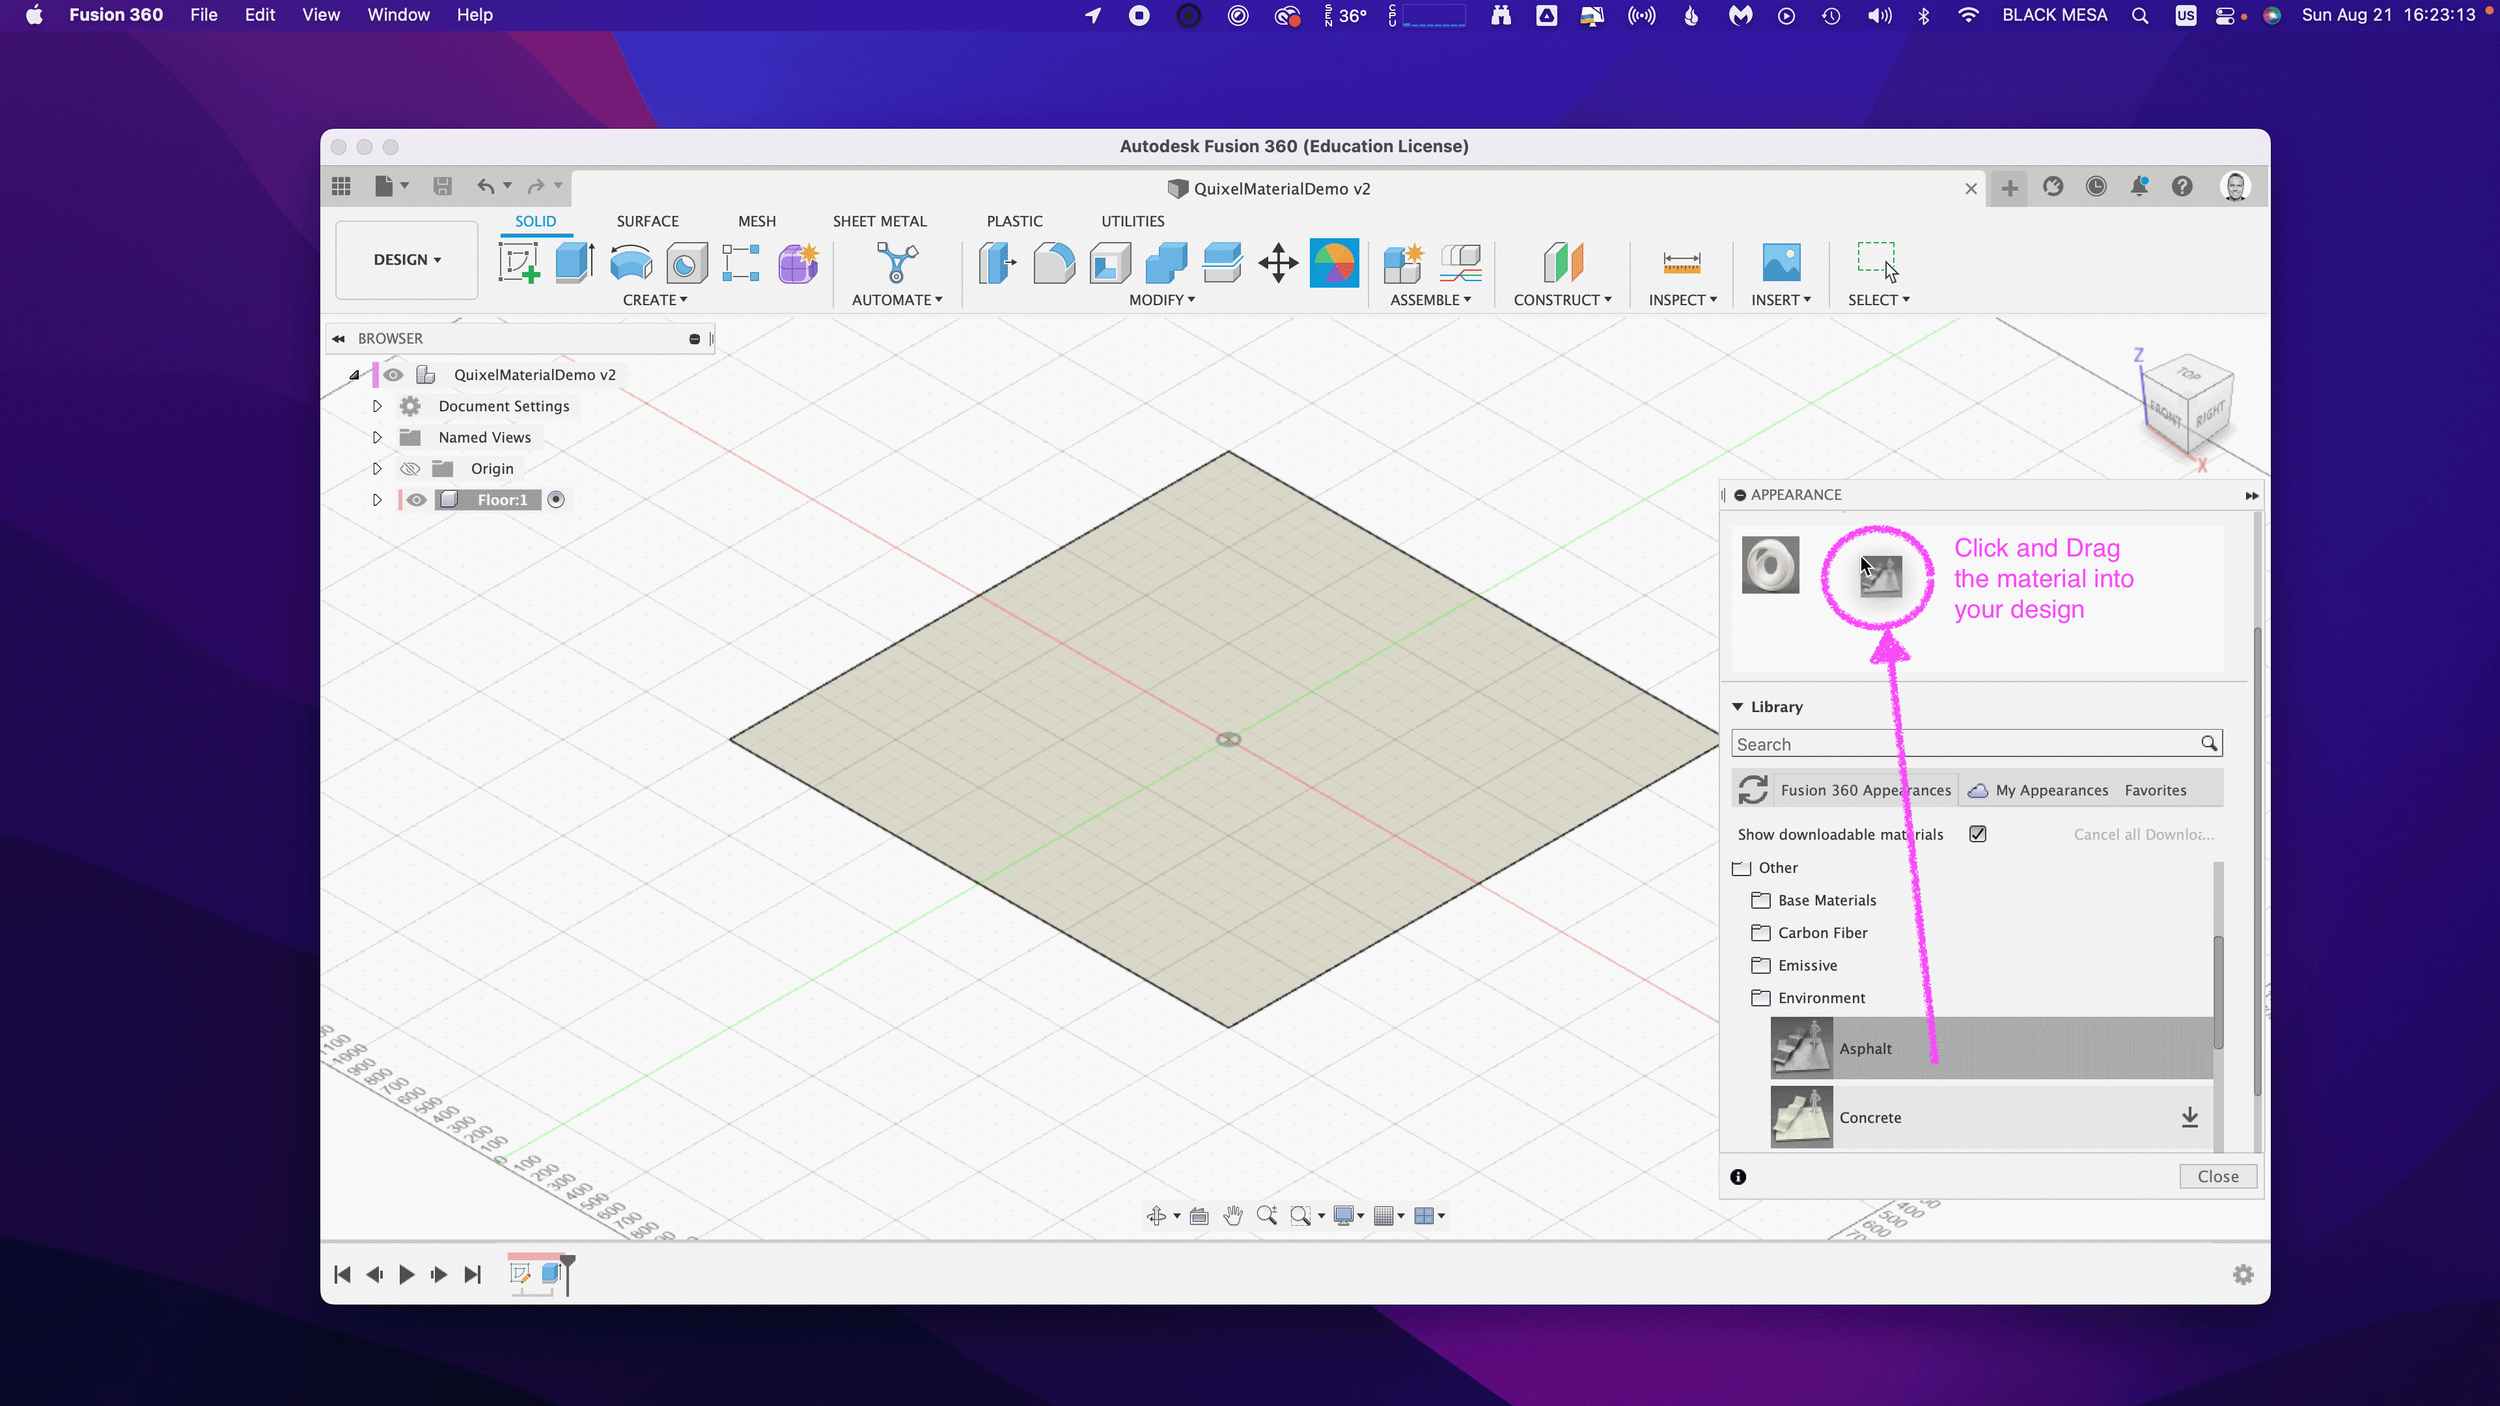
We can then replace the default material with the Asphalt.
5. Replace Fusion 360 Material with Quixel Mix
Next, we can begin modifying the Fusion 360 Asphalt material with the Quixel Mix.
As mentioned in Part I, the materials in Fusion 360 are made up of individual map image files:
Albedo/Diffusion/Color — the color a material reflects
Normal and/or Height Maps — the bumps and imperfections along a surface
Roughness — the smoothness of a surface (ranging from a sharp reflection to fuzzy/diffuse)
Reflectance/Specular/Metalness — the reflectiveness of a surface (ranging from mirror finish to a dull surface)
Anisotropy/Ambient Occlusion — the shadows along a surface
Refractive —how light bends through a surface
Emissive — how much light a surface emits (glow)
Translucency/Opacity — how transparent a surface is to light
If you’re using the included sample images, you’ll find some but not all of these maps. Depending on what materials you’re mixing, you’ll need different image maps. The sample image package includes:

Floor_Diffuse.png — Color (placed in Parameters)
Floor_Roughness.png — Roughness (placed in Parameters)
Floor_Specular.png — Reflectance (placed in Parameters)
Floor_Normal.png — Normal (placed in Relief Pattern (Bump))
Floor_AO.png — Anisotropy (placed in Advanced Highlight Controls)
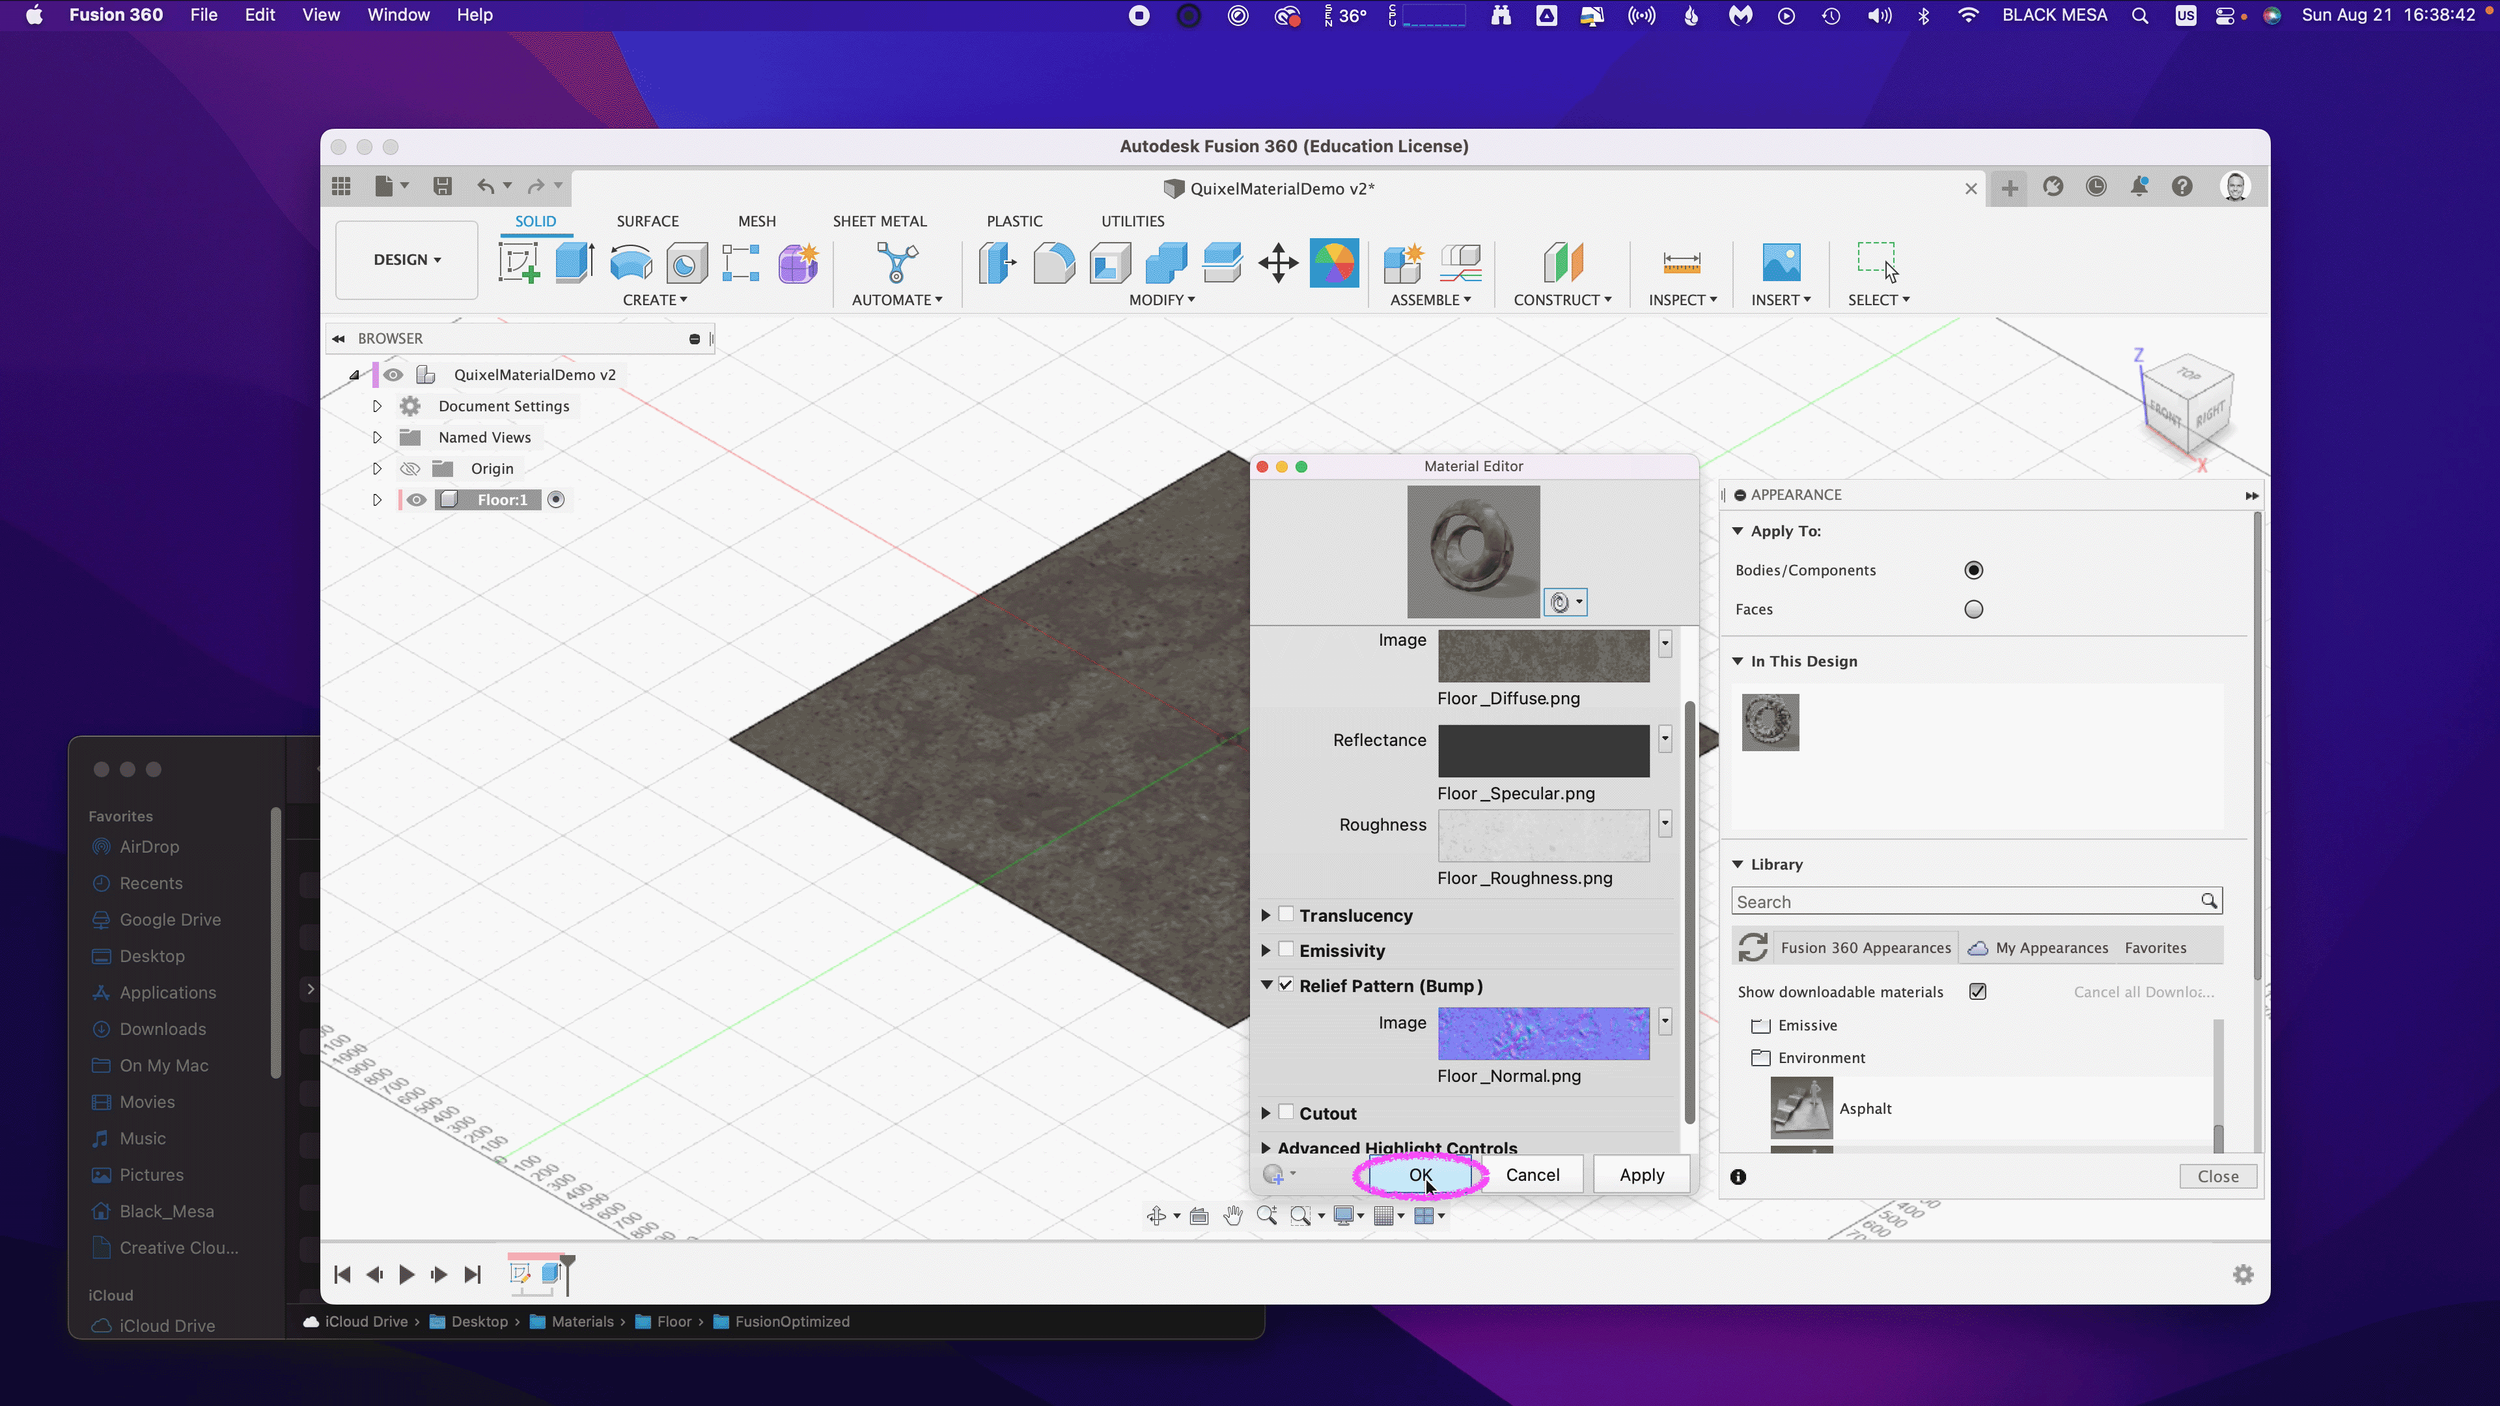
By replacing and adding these map files to the Fusion 360 Asphalt material, you can transform it to the Quixel mix. To start this replacement process, open the Appearance window, double-click the Asphalt material and then click “Advanced…”
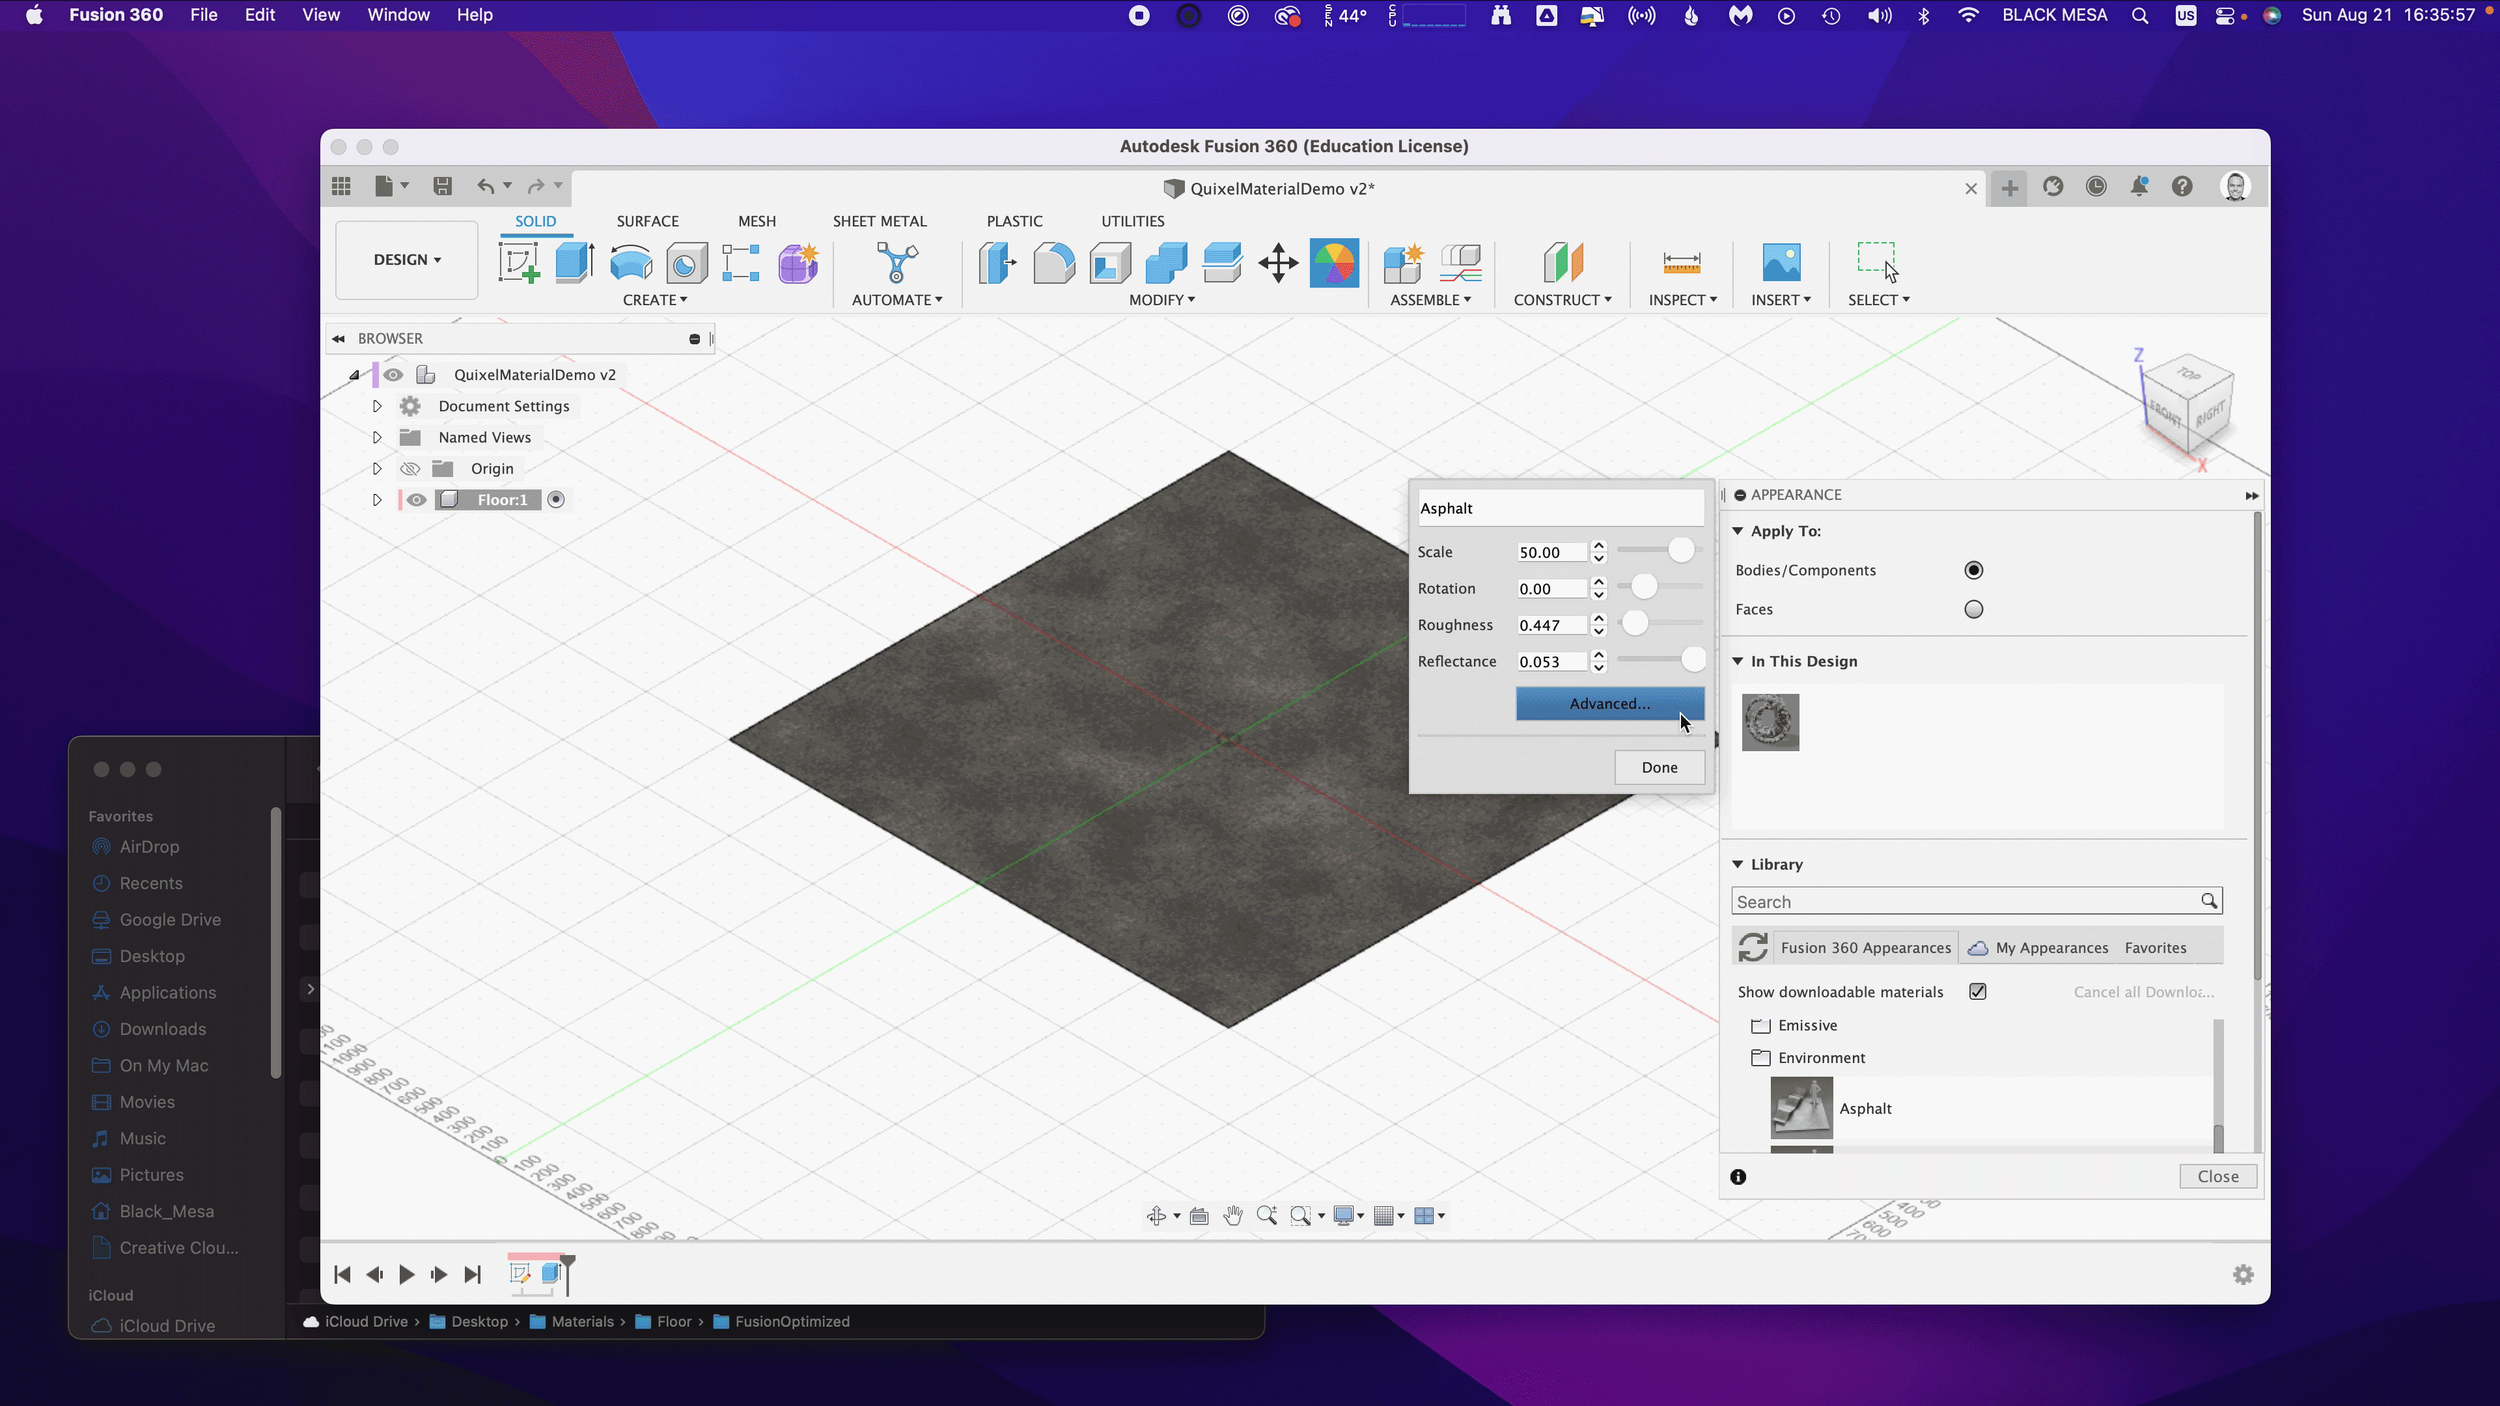
Rename the material to “Quixel_Asphalt” to distinguish the material from the original Fusion 360 Asphalt.

Under Parameters, we can add three (3) image maps. First, we’ll apply the diffusion/color map to the Image input in Fusion 360. Click on the Image filename 1_mats_surface_asphalt_color.jpg and navigate to your replacement images.

Select your Albedo/Color/Diffuse map file. If you’re using the sample images, it’s the file named Floor_Diffuse.png. Click Open to replace the default image file.

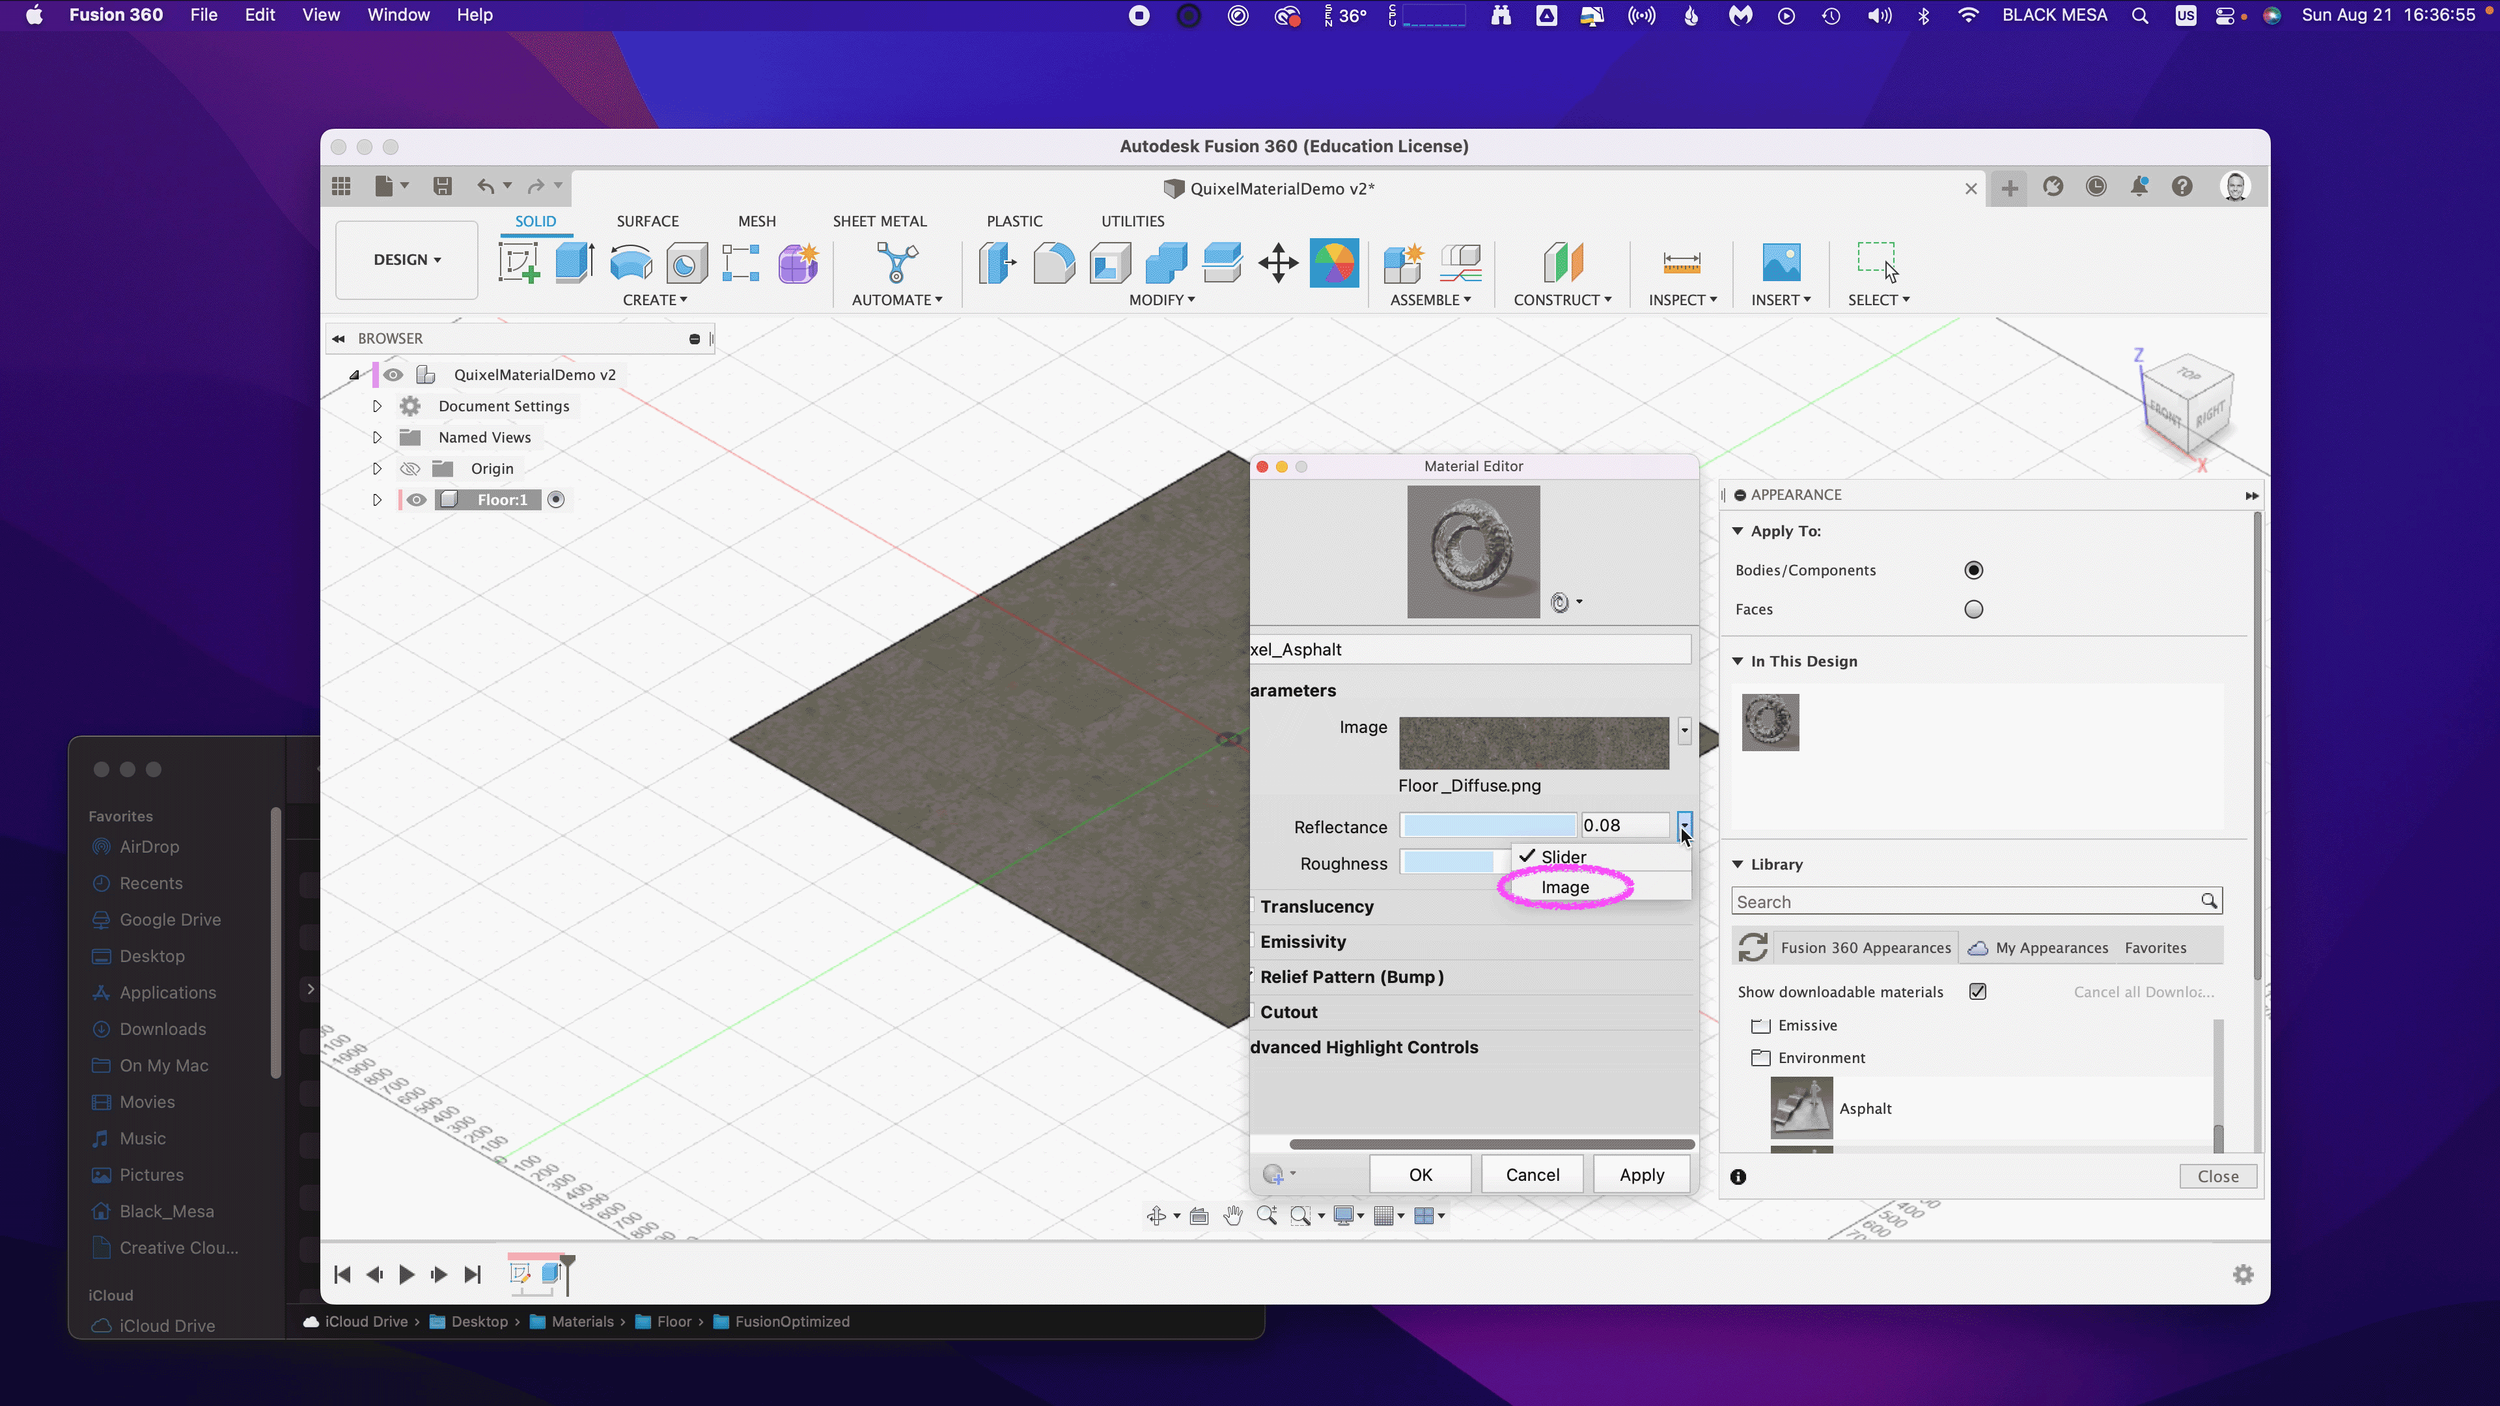
Next, we’ll repeat the process with the Reflectance and Roughness maps. By default, these two material attributes are set as Slider values, click the drop down arrow and then select Image to replace the slider value with an image map.
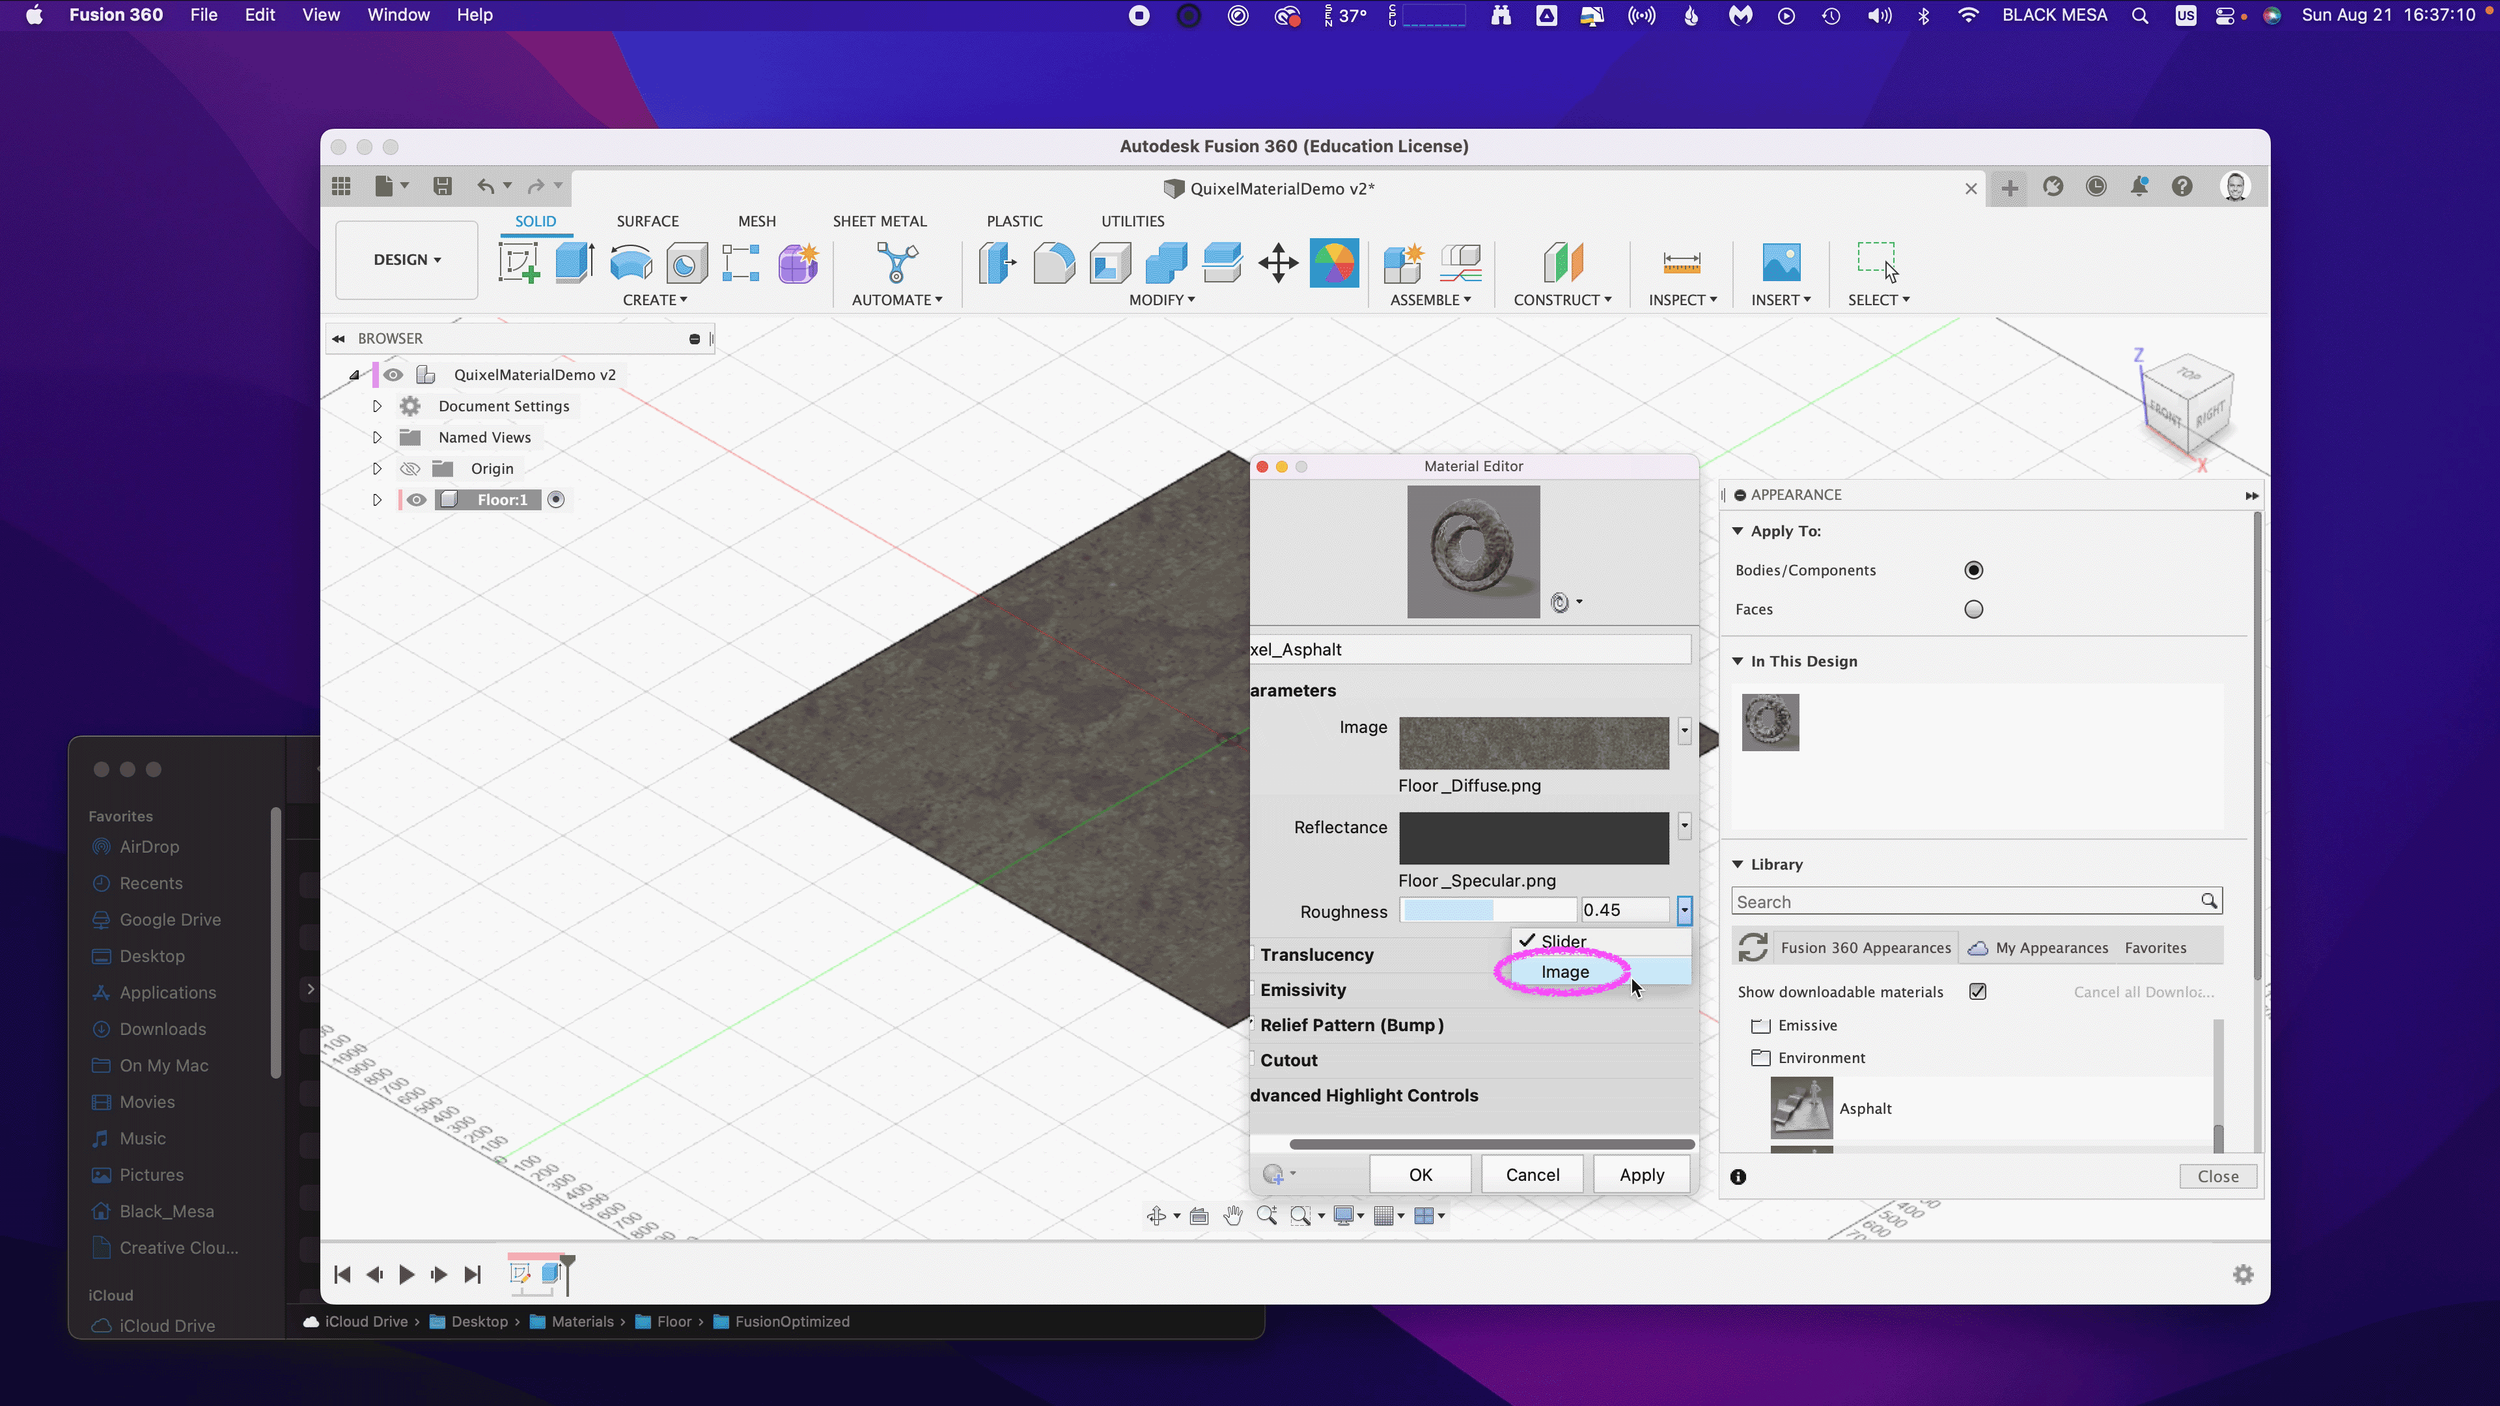
Next, select the Metallic/Specular image map if you’re using the sample images, select Floor_Specular.png and click Open.

Next, repeat the same steps for the Roughness value. Select Image and then select your Roughness Map. If you’re using the sample images, select the Floor_Roughness.png.

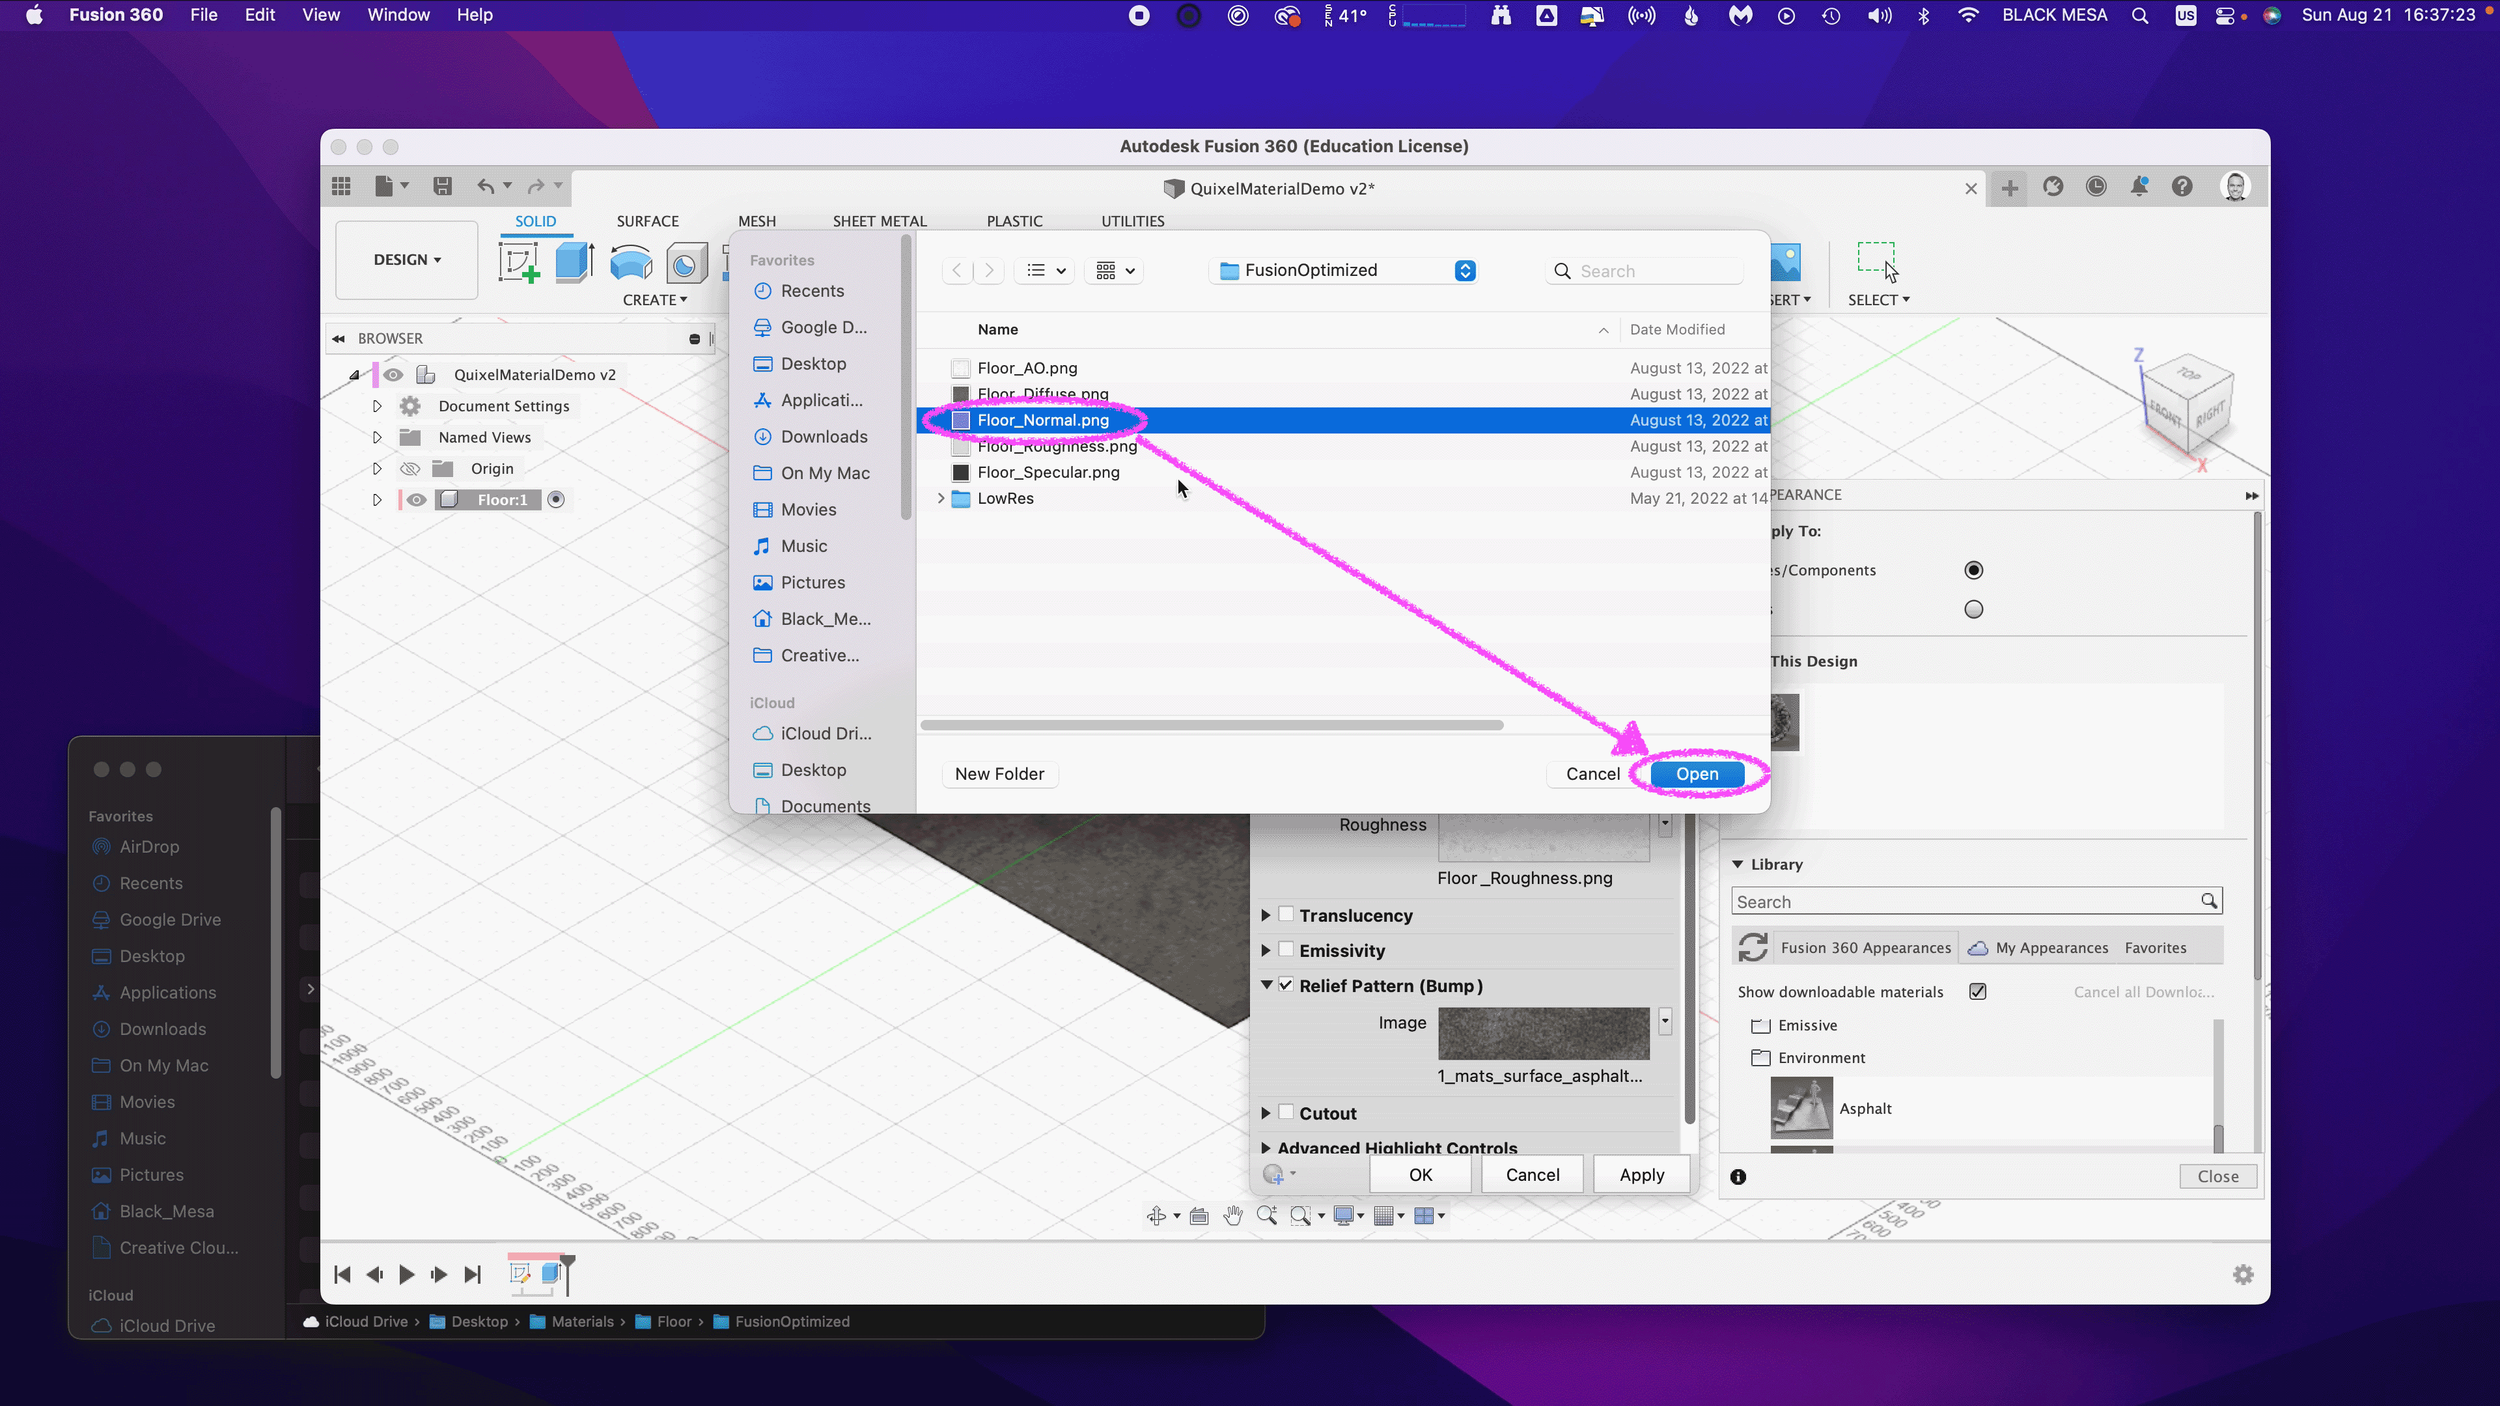
Now that we’ve completed the three Parameter maps, we can move on to the Relief Pattern (Bump) map. Once again, we’ll replace the default image file (1_mats_surface_asphalt_.jpg) associated with the material. Note: Fusion 360 supports both bump and normal maps. If you want to know more about these two approaches to texturing a 3D model, then click here.

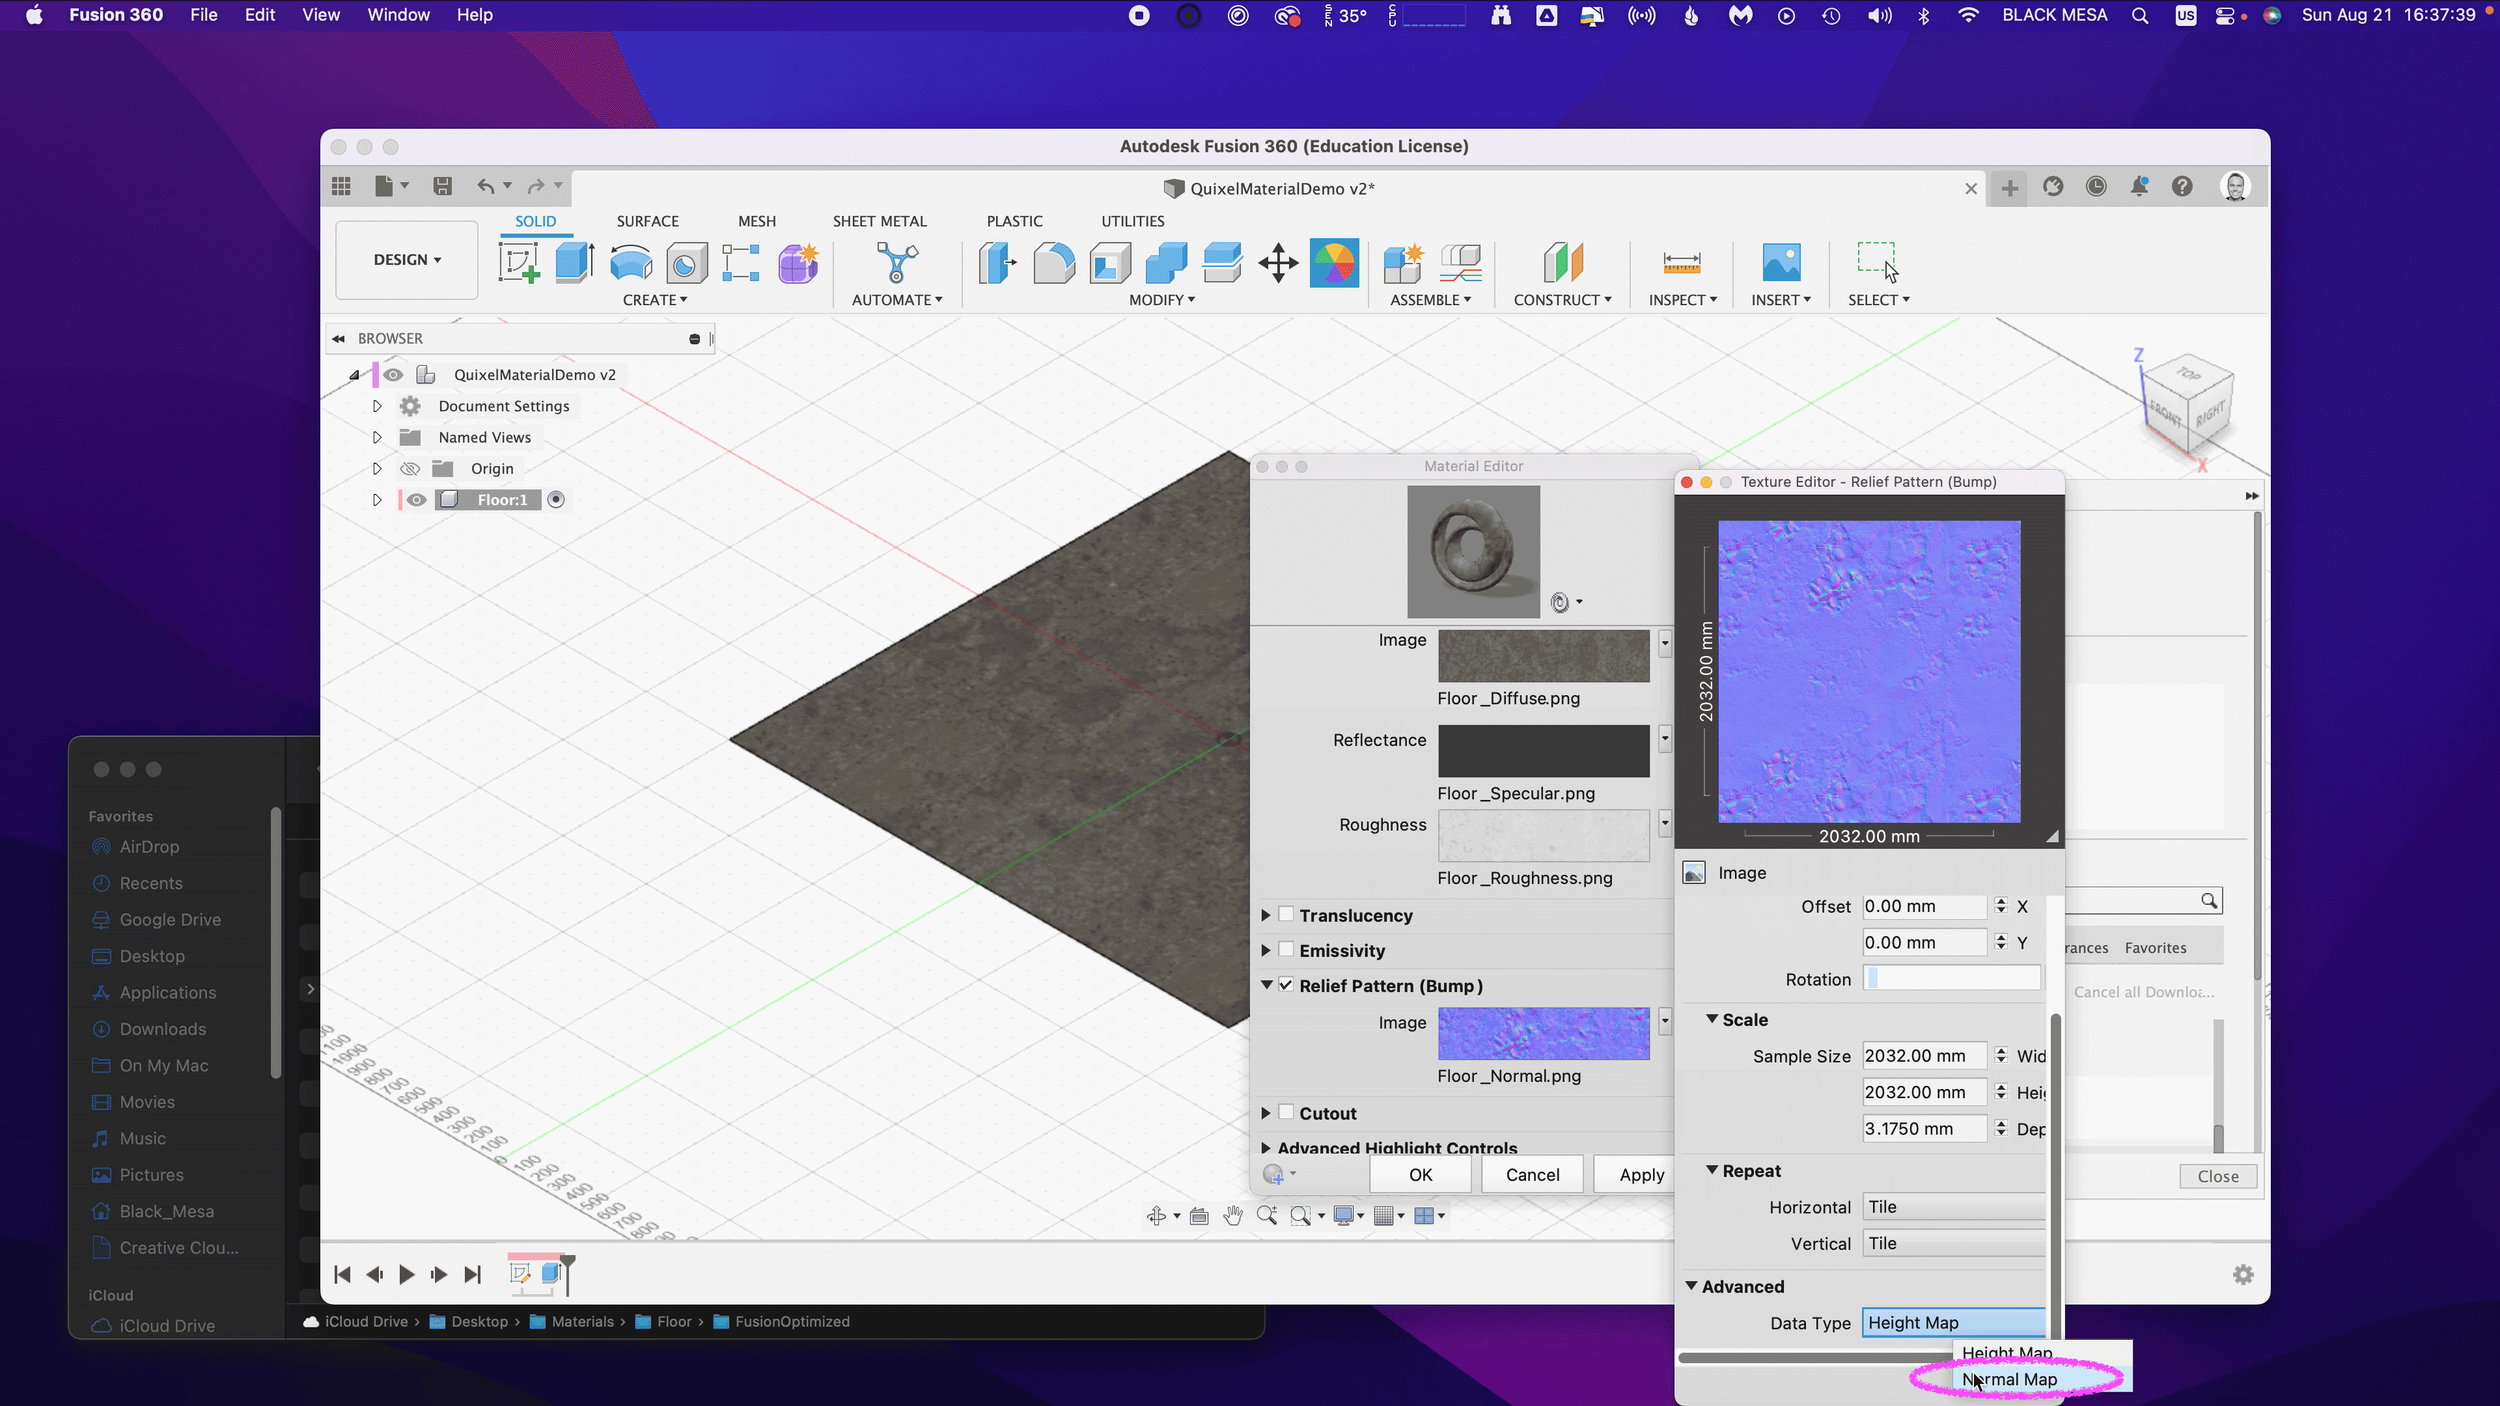
Next, we need to change the Relief Pattern from a Height Map to a Normal Map. To do this, we need to Edit the image.

Next, scroll down to Advanced and change Data Type to Normal Map.
Next, we need to ensure that all of our maps are using the same Sample Size. Be sure to repeat this step for all image maps. We also need to ensure that all of our Maps have Linked texture transforms. Check the Link texture transforms under the Transforms section of the Texture Editor. Be sure to repeat this step for all image maps.

These steps are important, because they ensure that all of the image map data are aligned equally to the material in Fusion 360. After you’ve verified these settings, you can click “OK” to finalize the changes to this material.
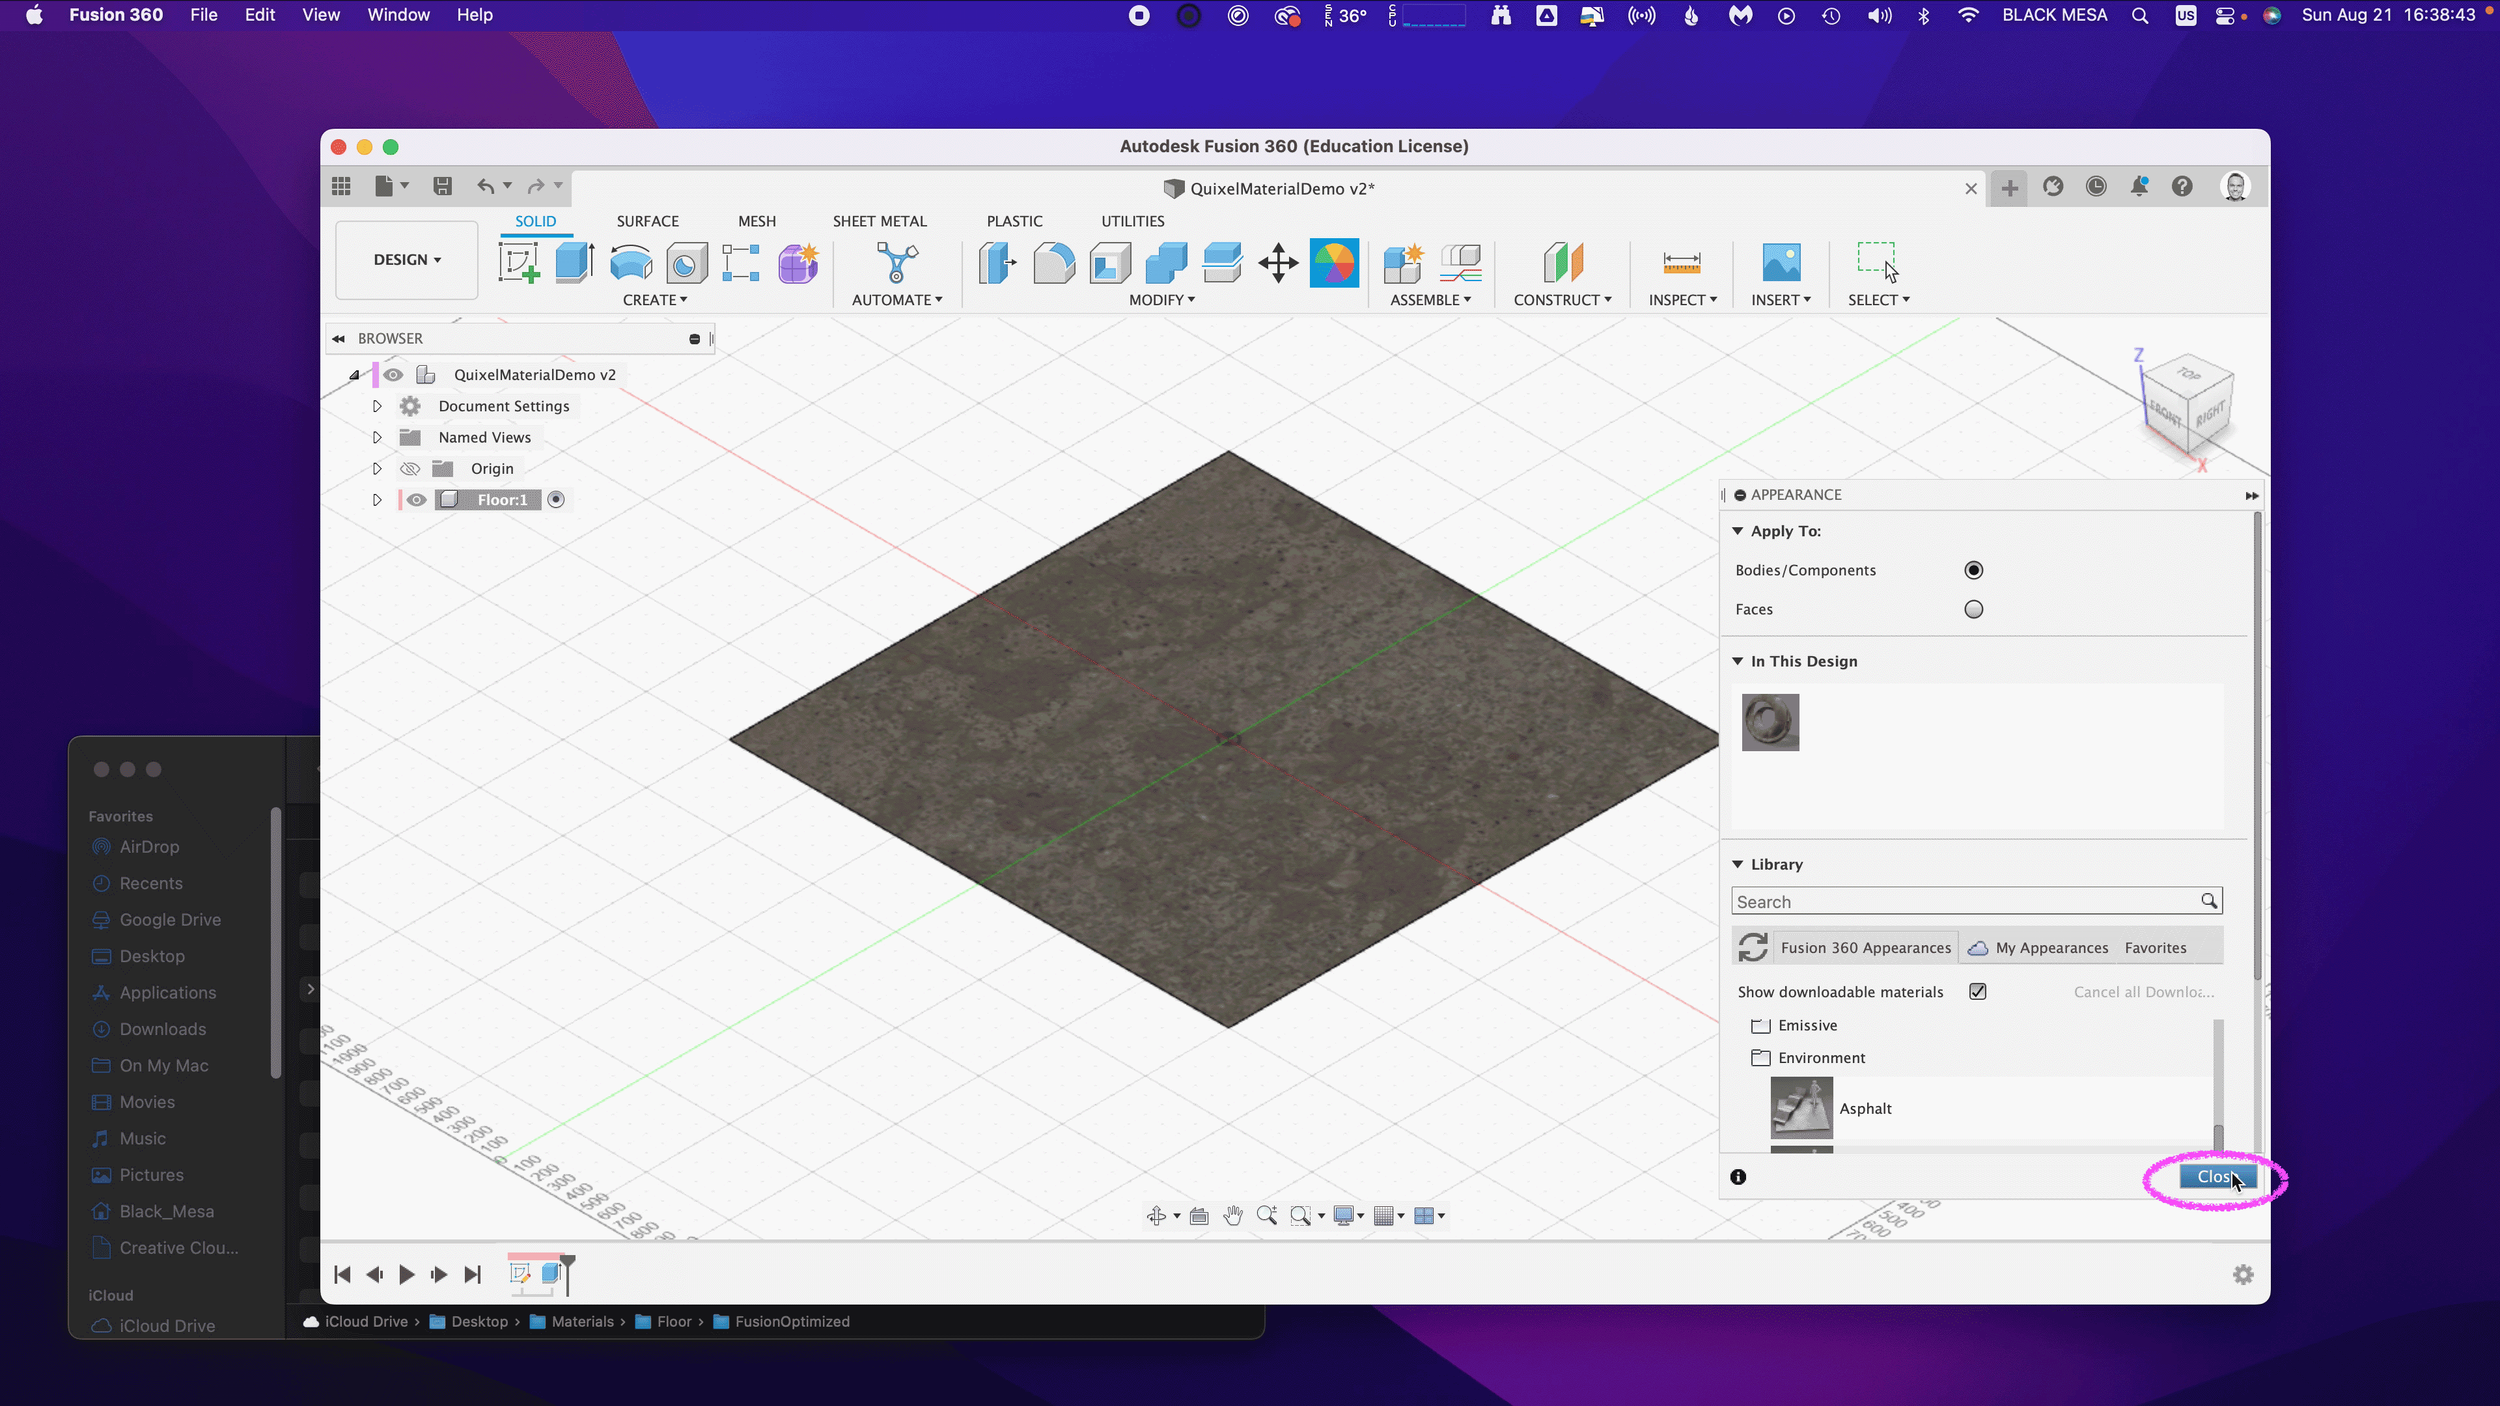
Now that the material has been updated you can Close the Appearances window.
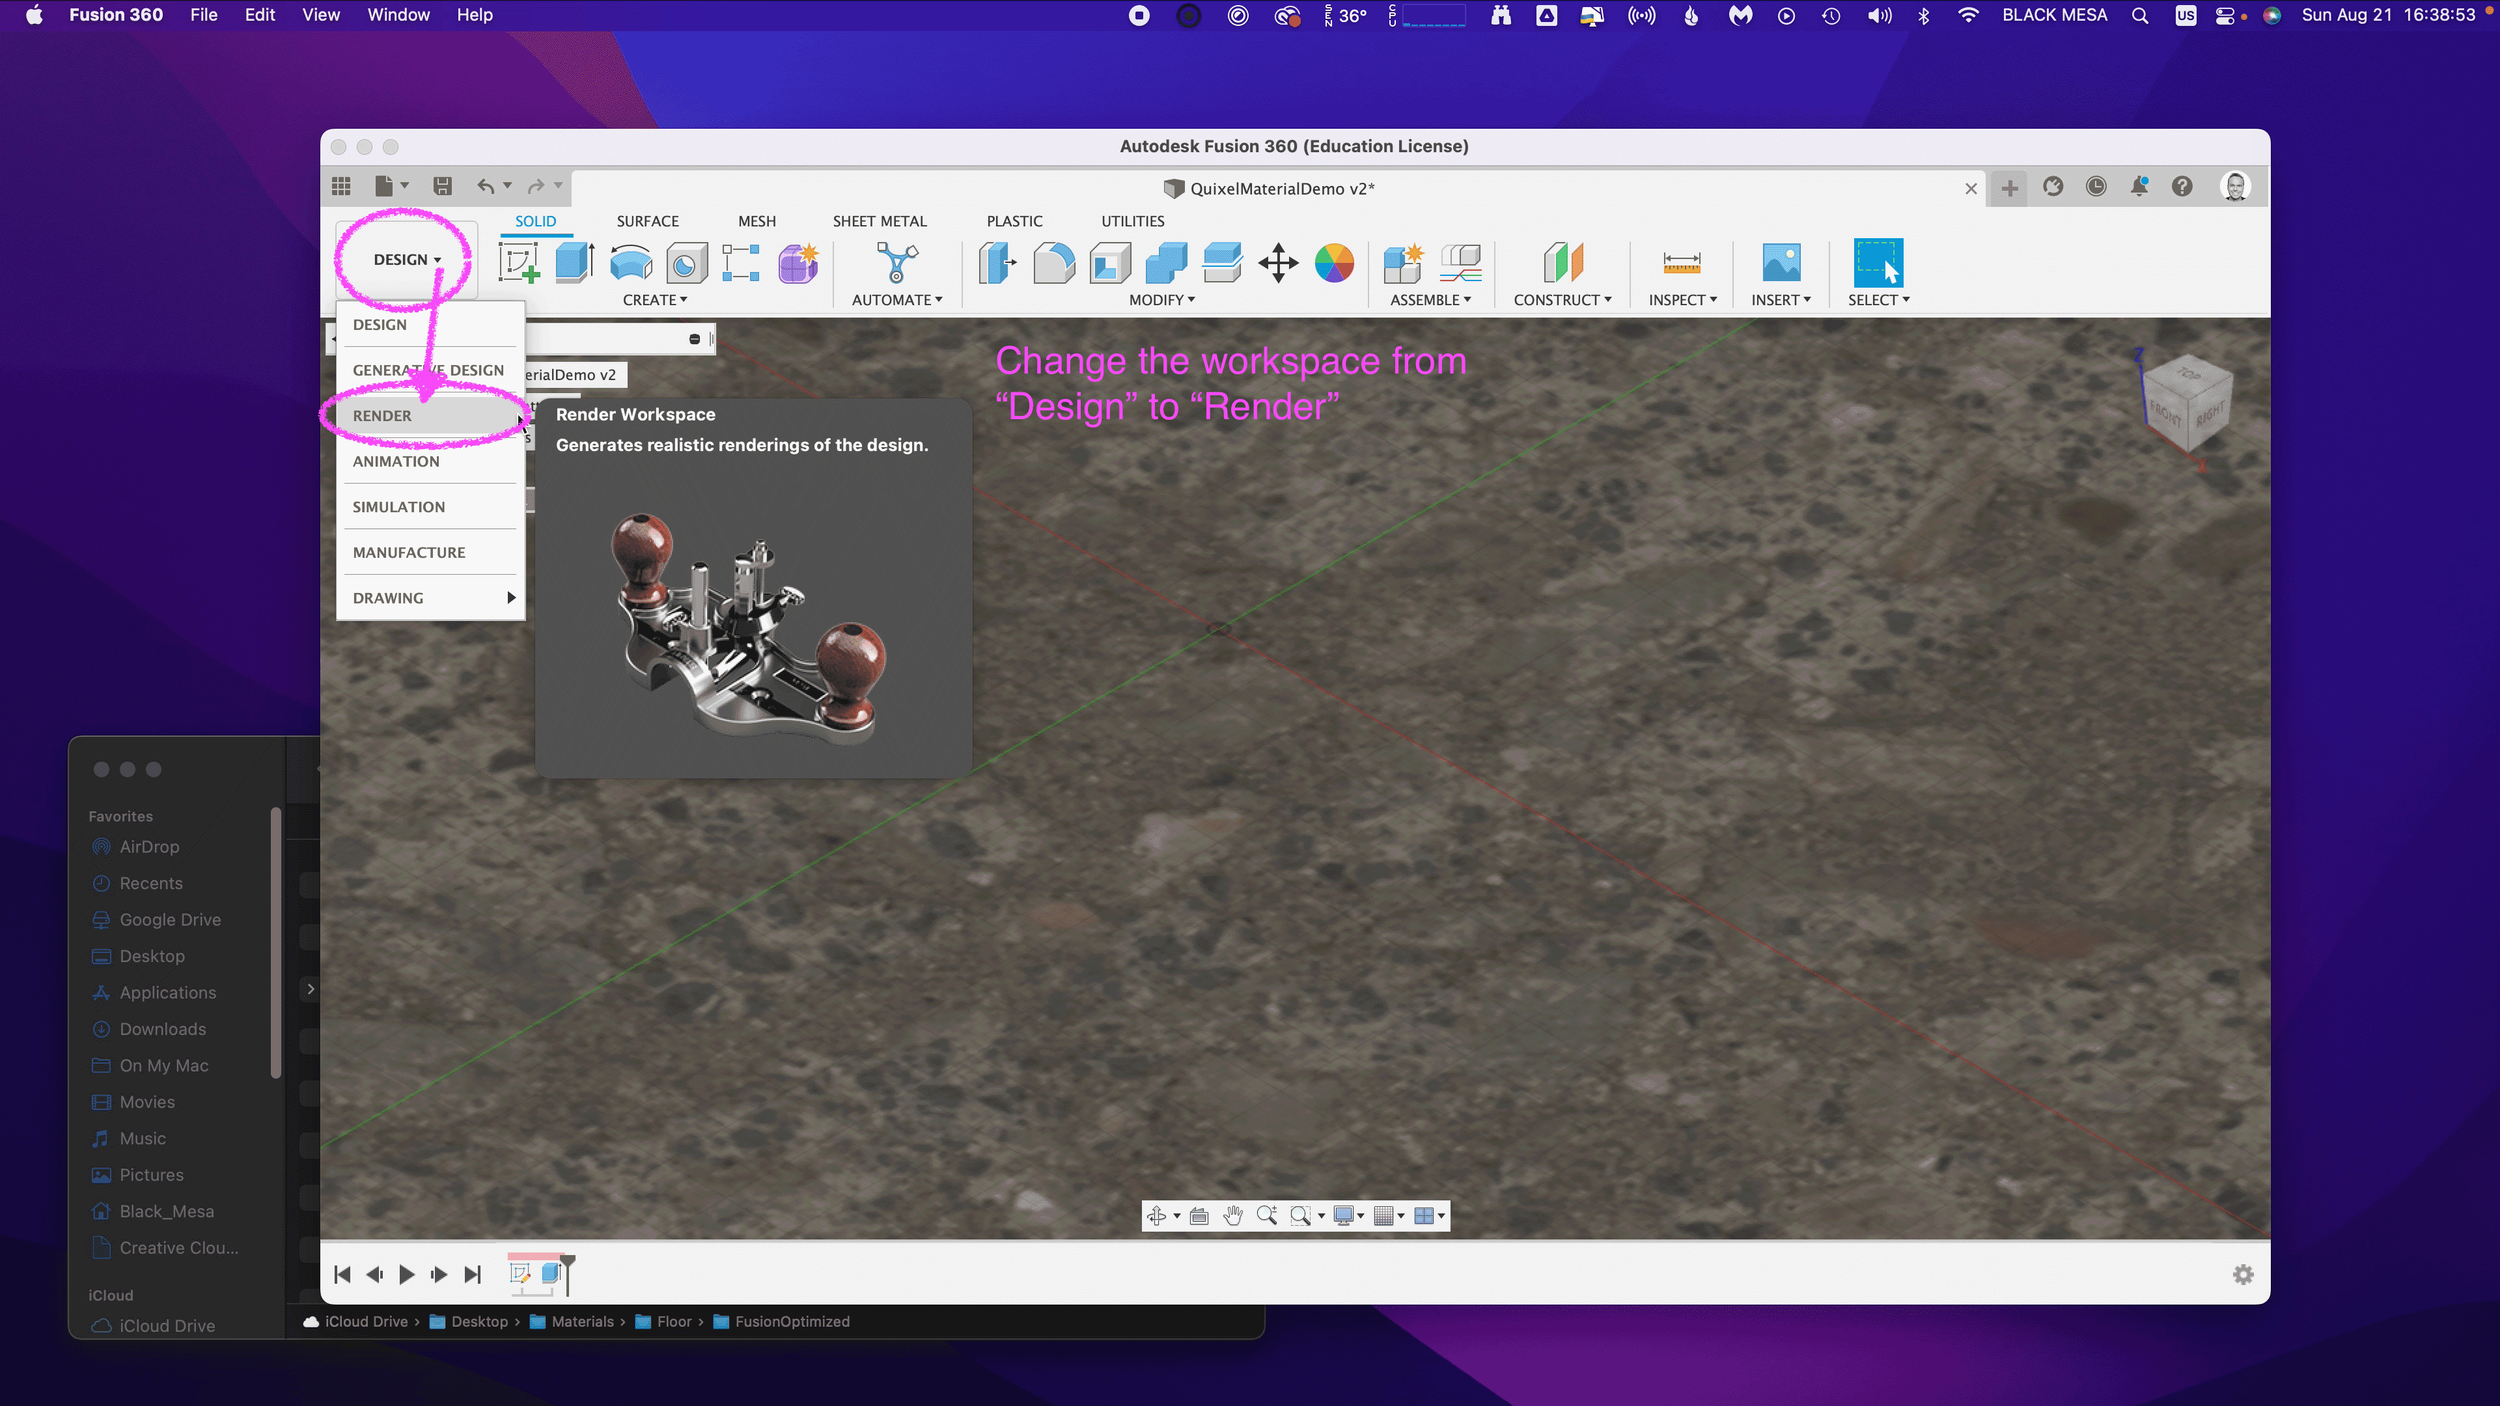
To check and validate our new material, we need to switch to the Render Workspace in Fusion 360. Click on the Workspace button, and change it from DESIGN to RENDER.
6. Test render scene
Next, let’s save the design to capture the new material settings in your Fusion 360 Timeline. Click File and Save.

Fusion 360 will prompt you to describe your save point. Let’s name this save “Quixel Material Added” and click OK.

Before we can test our new material, we need to edit the SCENE SETTINGS from the SETUP Menu. Open the SCENE SETTING Window and Click+Drag “Dry lake bed” to the Current Environment and then Click Close.

We also need to change the IN-CANVAS RENDER settings to FAST, so that we can easily see the material’s performance during rendering. To do this, click on the IN-CANVAS RENDER SETTINGS icon and Click on the Fast tab. Then, Click OK to update the rendering method.

Next, we can preview the rendering, and see how the various maps work together under different lighting conditions. To do this, start the In-Canvas Rendering and then open Scene Settings, click on the Position Icon to bring up the Rotation and Scale Sliders. By changing the rotation, you can see how the surface of your floor object casts shadows at different angles, corresponding to the surface material.
Make sure to save your project to retain your rendering settings. If you’ve made it this far, then congratulations! You now have all of the information necessary to import Quixel Mixer materials in Fusion 360. In Part 3, we’ll explore some techniques for applying these materials to complex geometries, and how to post-process your images for additional realness. In Part 4, we’ll take these realistic models and generate Augmented Reality experiences for iOS.
Stay tuned!